How to Make Chiffon Cake
Chiffon cake is an introductory baking recipe with a moderate level of difficulty. However, once successfully prepared, its texture is delicate and soft, leaving a lasting impression. Including baking time, beginners typically need 1.5 - 2 hours to complete it.
Estimated Cooking Difficulty: ★★★☆☆
Essential Ingredients and Tools
Tools
- Oven (a rice cooker can be used as a substitute, but it is prone to failure in most cases due to the material of the inner pot)
- Electric mixer (highly recommended; manual mixing is laborious and has a higher risk of failure) or chopsticks (strongly not recommended)
- Aluminum alloy anodized cake pan (do not use non-stick pans; common sizes are 6-inch or 8-inch)
- Spatula (used for folding the cake batter)
Ingredients
- Eggs
- White sugar
- Milk (or water)
- Cooking oil (or butter, but it needs to be heated and softened)
- Low-protein flour (Huiyi brand recommended)
- [Optional] Lemon juice or white vinegar
Calculations
Per portion (12 square units):
- 1 egg (standard medium size, approx. 50g)
- White sugar 16g
- Cooking oil 8g
- Milk 10g
- Low-protein flour 17g
Specifically, for common 6-inch and 8-inch cakes:
- 6-inch: Size is 3 portions (i.e., three eggs). Area is 36 square units.
- 3 eggs, 50g white sugar, 25g cooking oil, 30g milk, 50g low-protein flour
- 8-inch: Size is 5 portions (i.e., five eggs). Area is 64 square units.
- 5 eggs, 80g white sugar, 40g cooking oil, 50g milk, 90g low-protein flour
Procedure
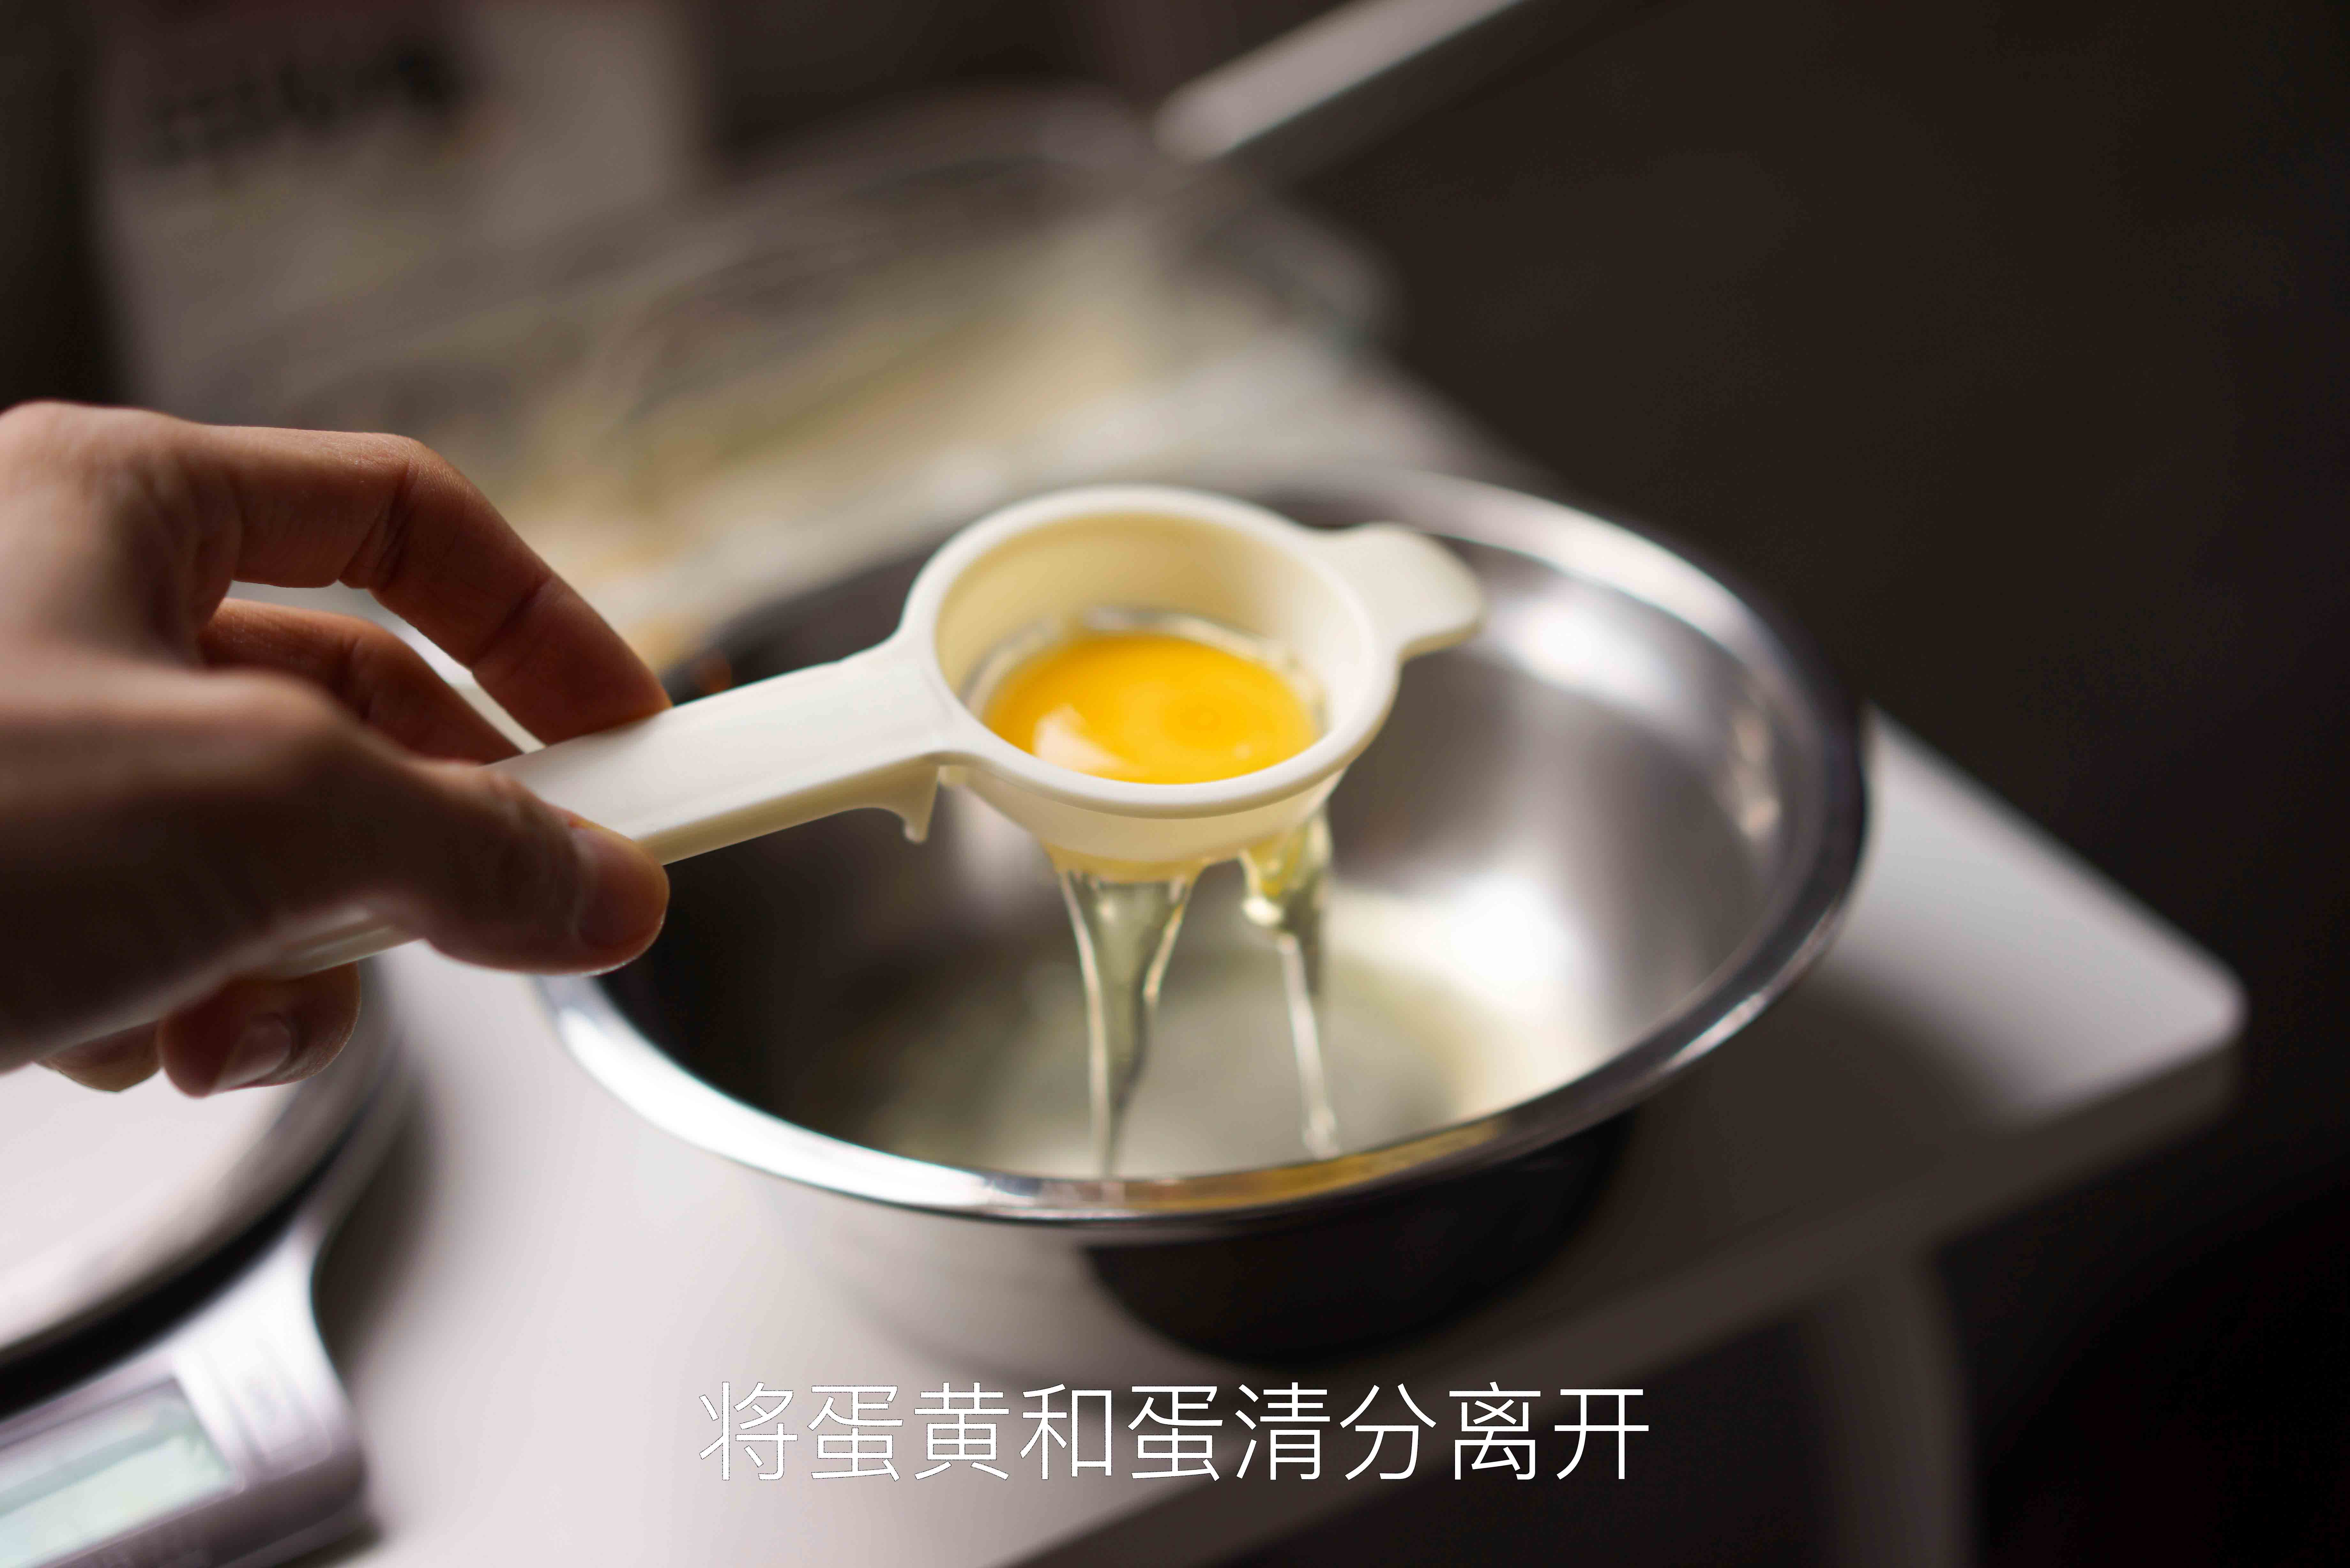
Initial Separation Steps
- Take fresh eggs out of the refrigerator
- Prepare two containers and dry them thoroughly; use one for egg whites and the other for egg yolks
- The container for egg whites can have slight moisture, but must be completely free of oil; the container for egg yolks must be free of water droplets
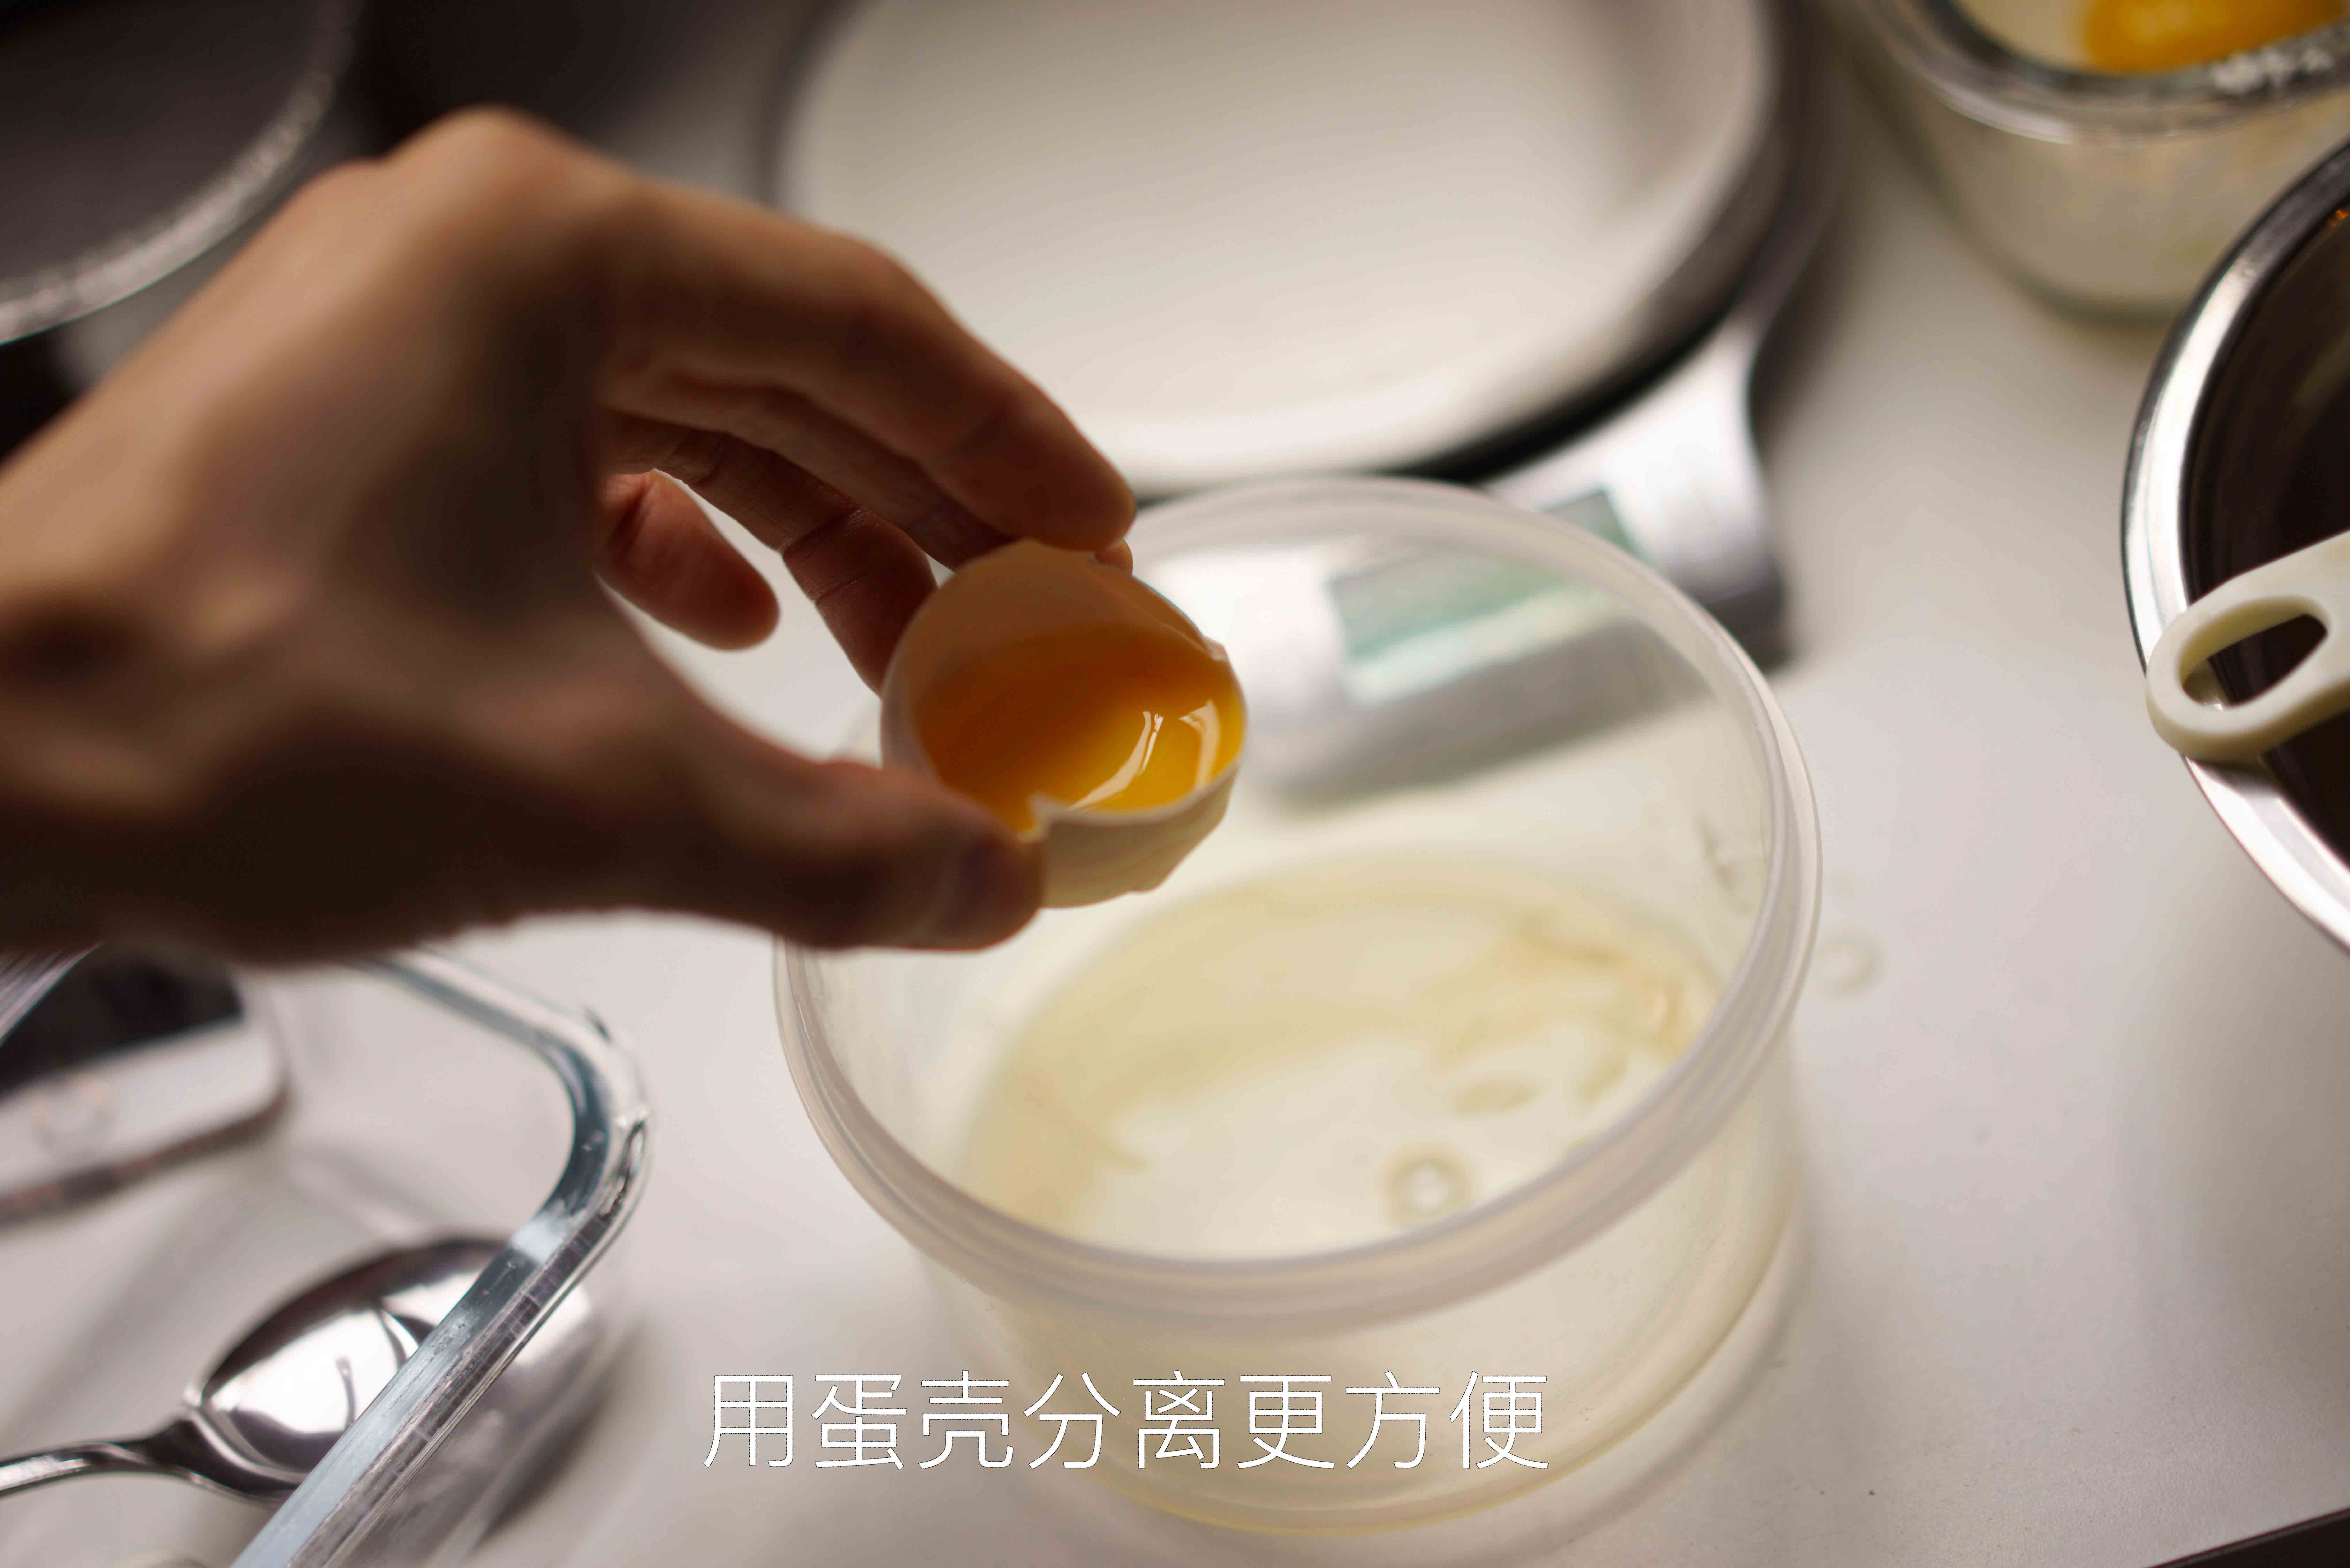
- Crack the eggs, using your hands or an egg separator, to separate the whites and yolks into the respective containers.
- Ensure the yolks do not break during separation, and no yolk should mix into the whites, as this will severely affect whipping. (Small strands of egg white membrane can go into the whites without issue.)
- (Note: If not using a stand mixer, the container holding the egg whites will also serve as the mixing bowl. To prevent overflow, ensure the volume of egg whites does not exceed 1/8 of the container's capacity after adding all of them.)
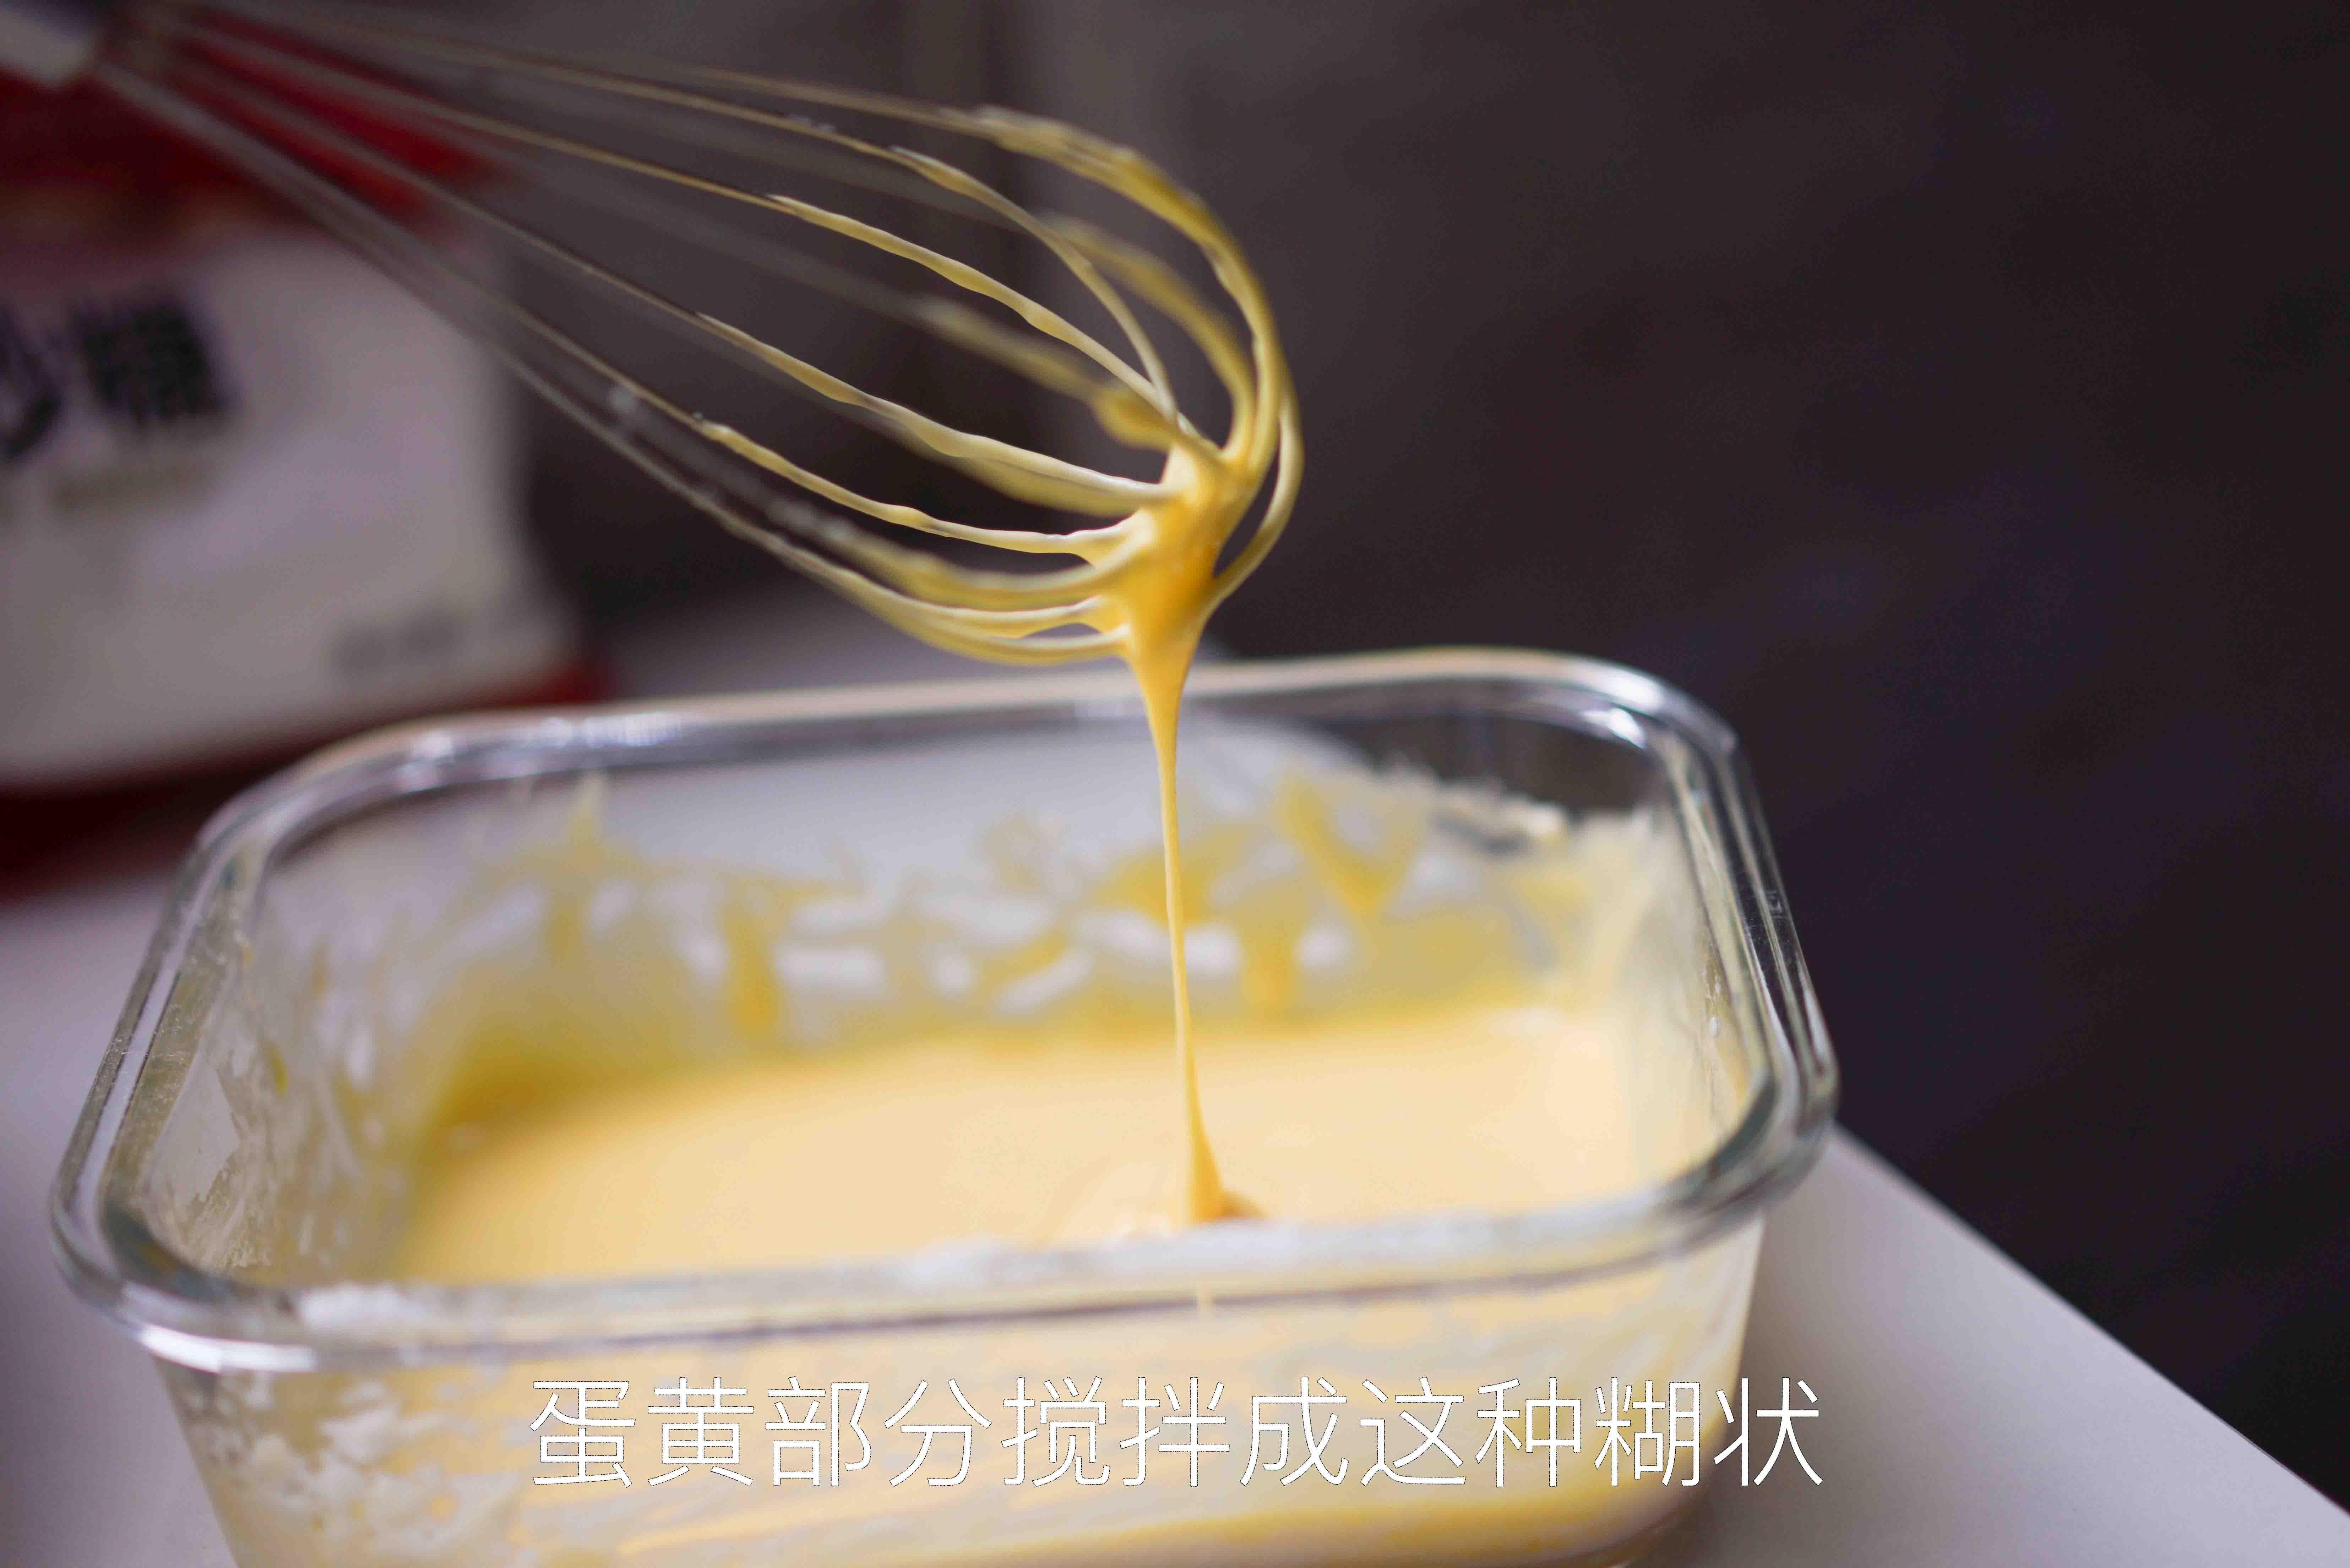
Mixing the Egg Yolk Mixture
- Prepare a clean, empty bowl, add all the cooking oil, then add the cake flour and stir
- The oil will directly inhibit the formation of gluten
- Add the egg yolks to the bowl, then add the milk and 1/4 of the granulated sugar. Stir evenly with a spatula
- Although the milk added at this stage contains water, gluten formation should not occur.
- Prepare the cake flour. While slowly sprinkling it into the bowl, stir in a "Z-shape" (zigzag) motion with a spatula. This means the spatula should only move along the sides or front/back relative to the blade's edge. Do not stir randomly in a clockwise or counter-clockwise direction
- Continue by adding all the flour, still using the above stirring method, until the mixture is uniform and no dry flour remains. (It is normal for some clumps to appear; continue stirring to disperse them)
- Let it rest and set aside
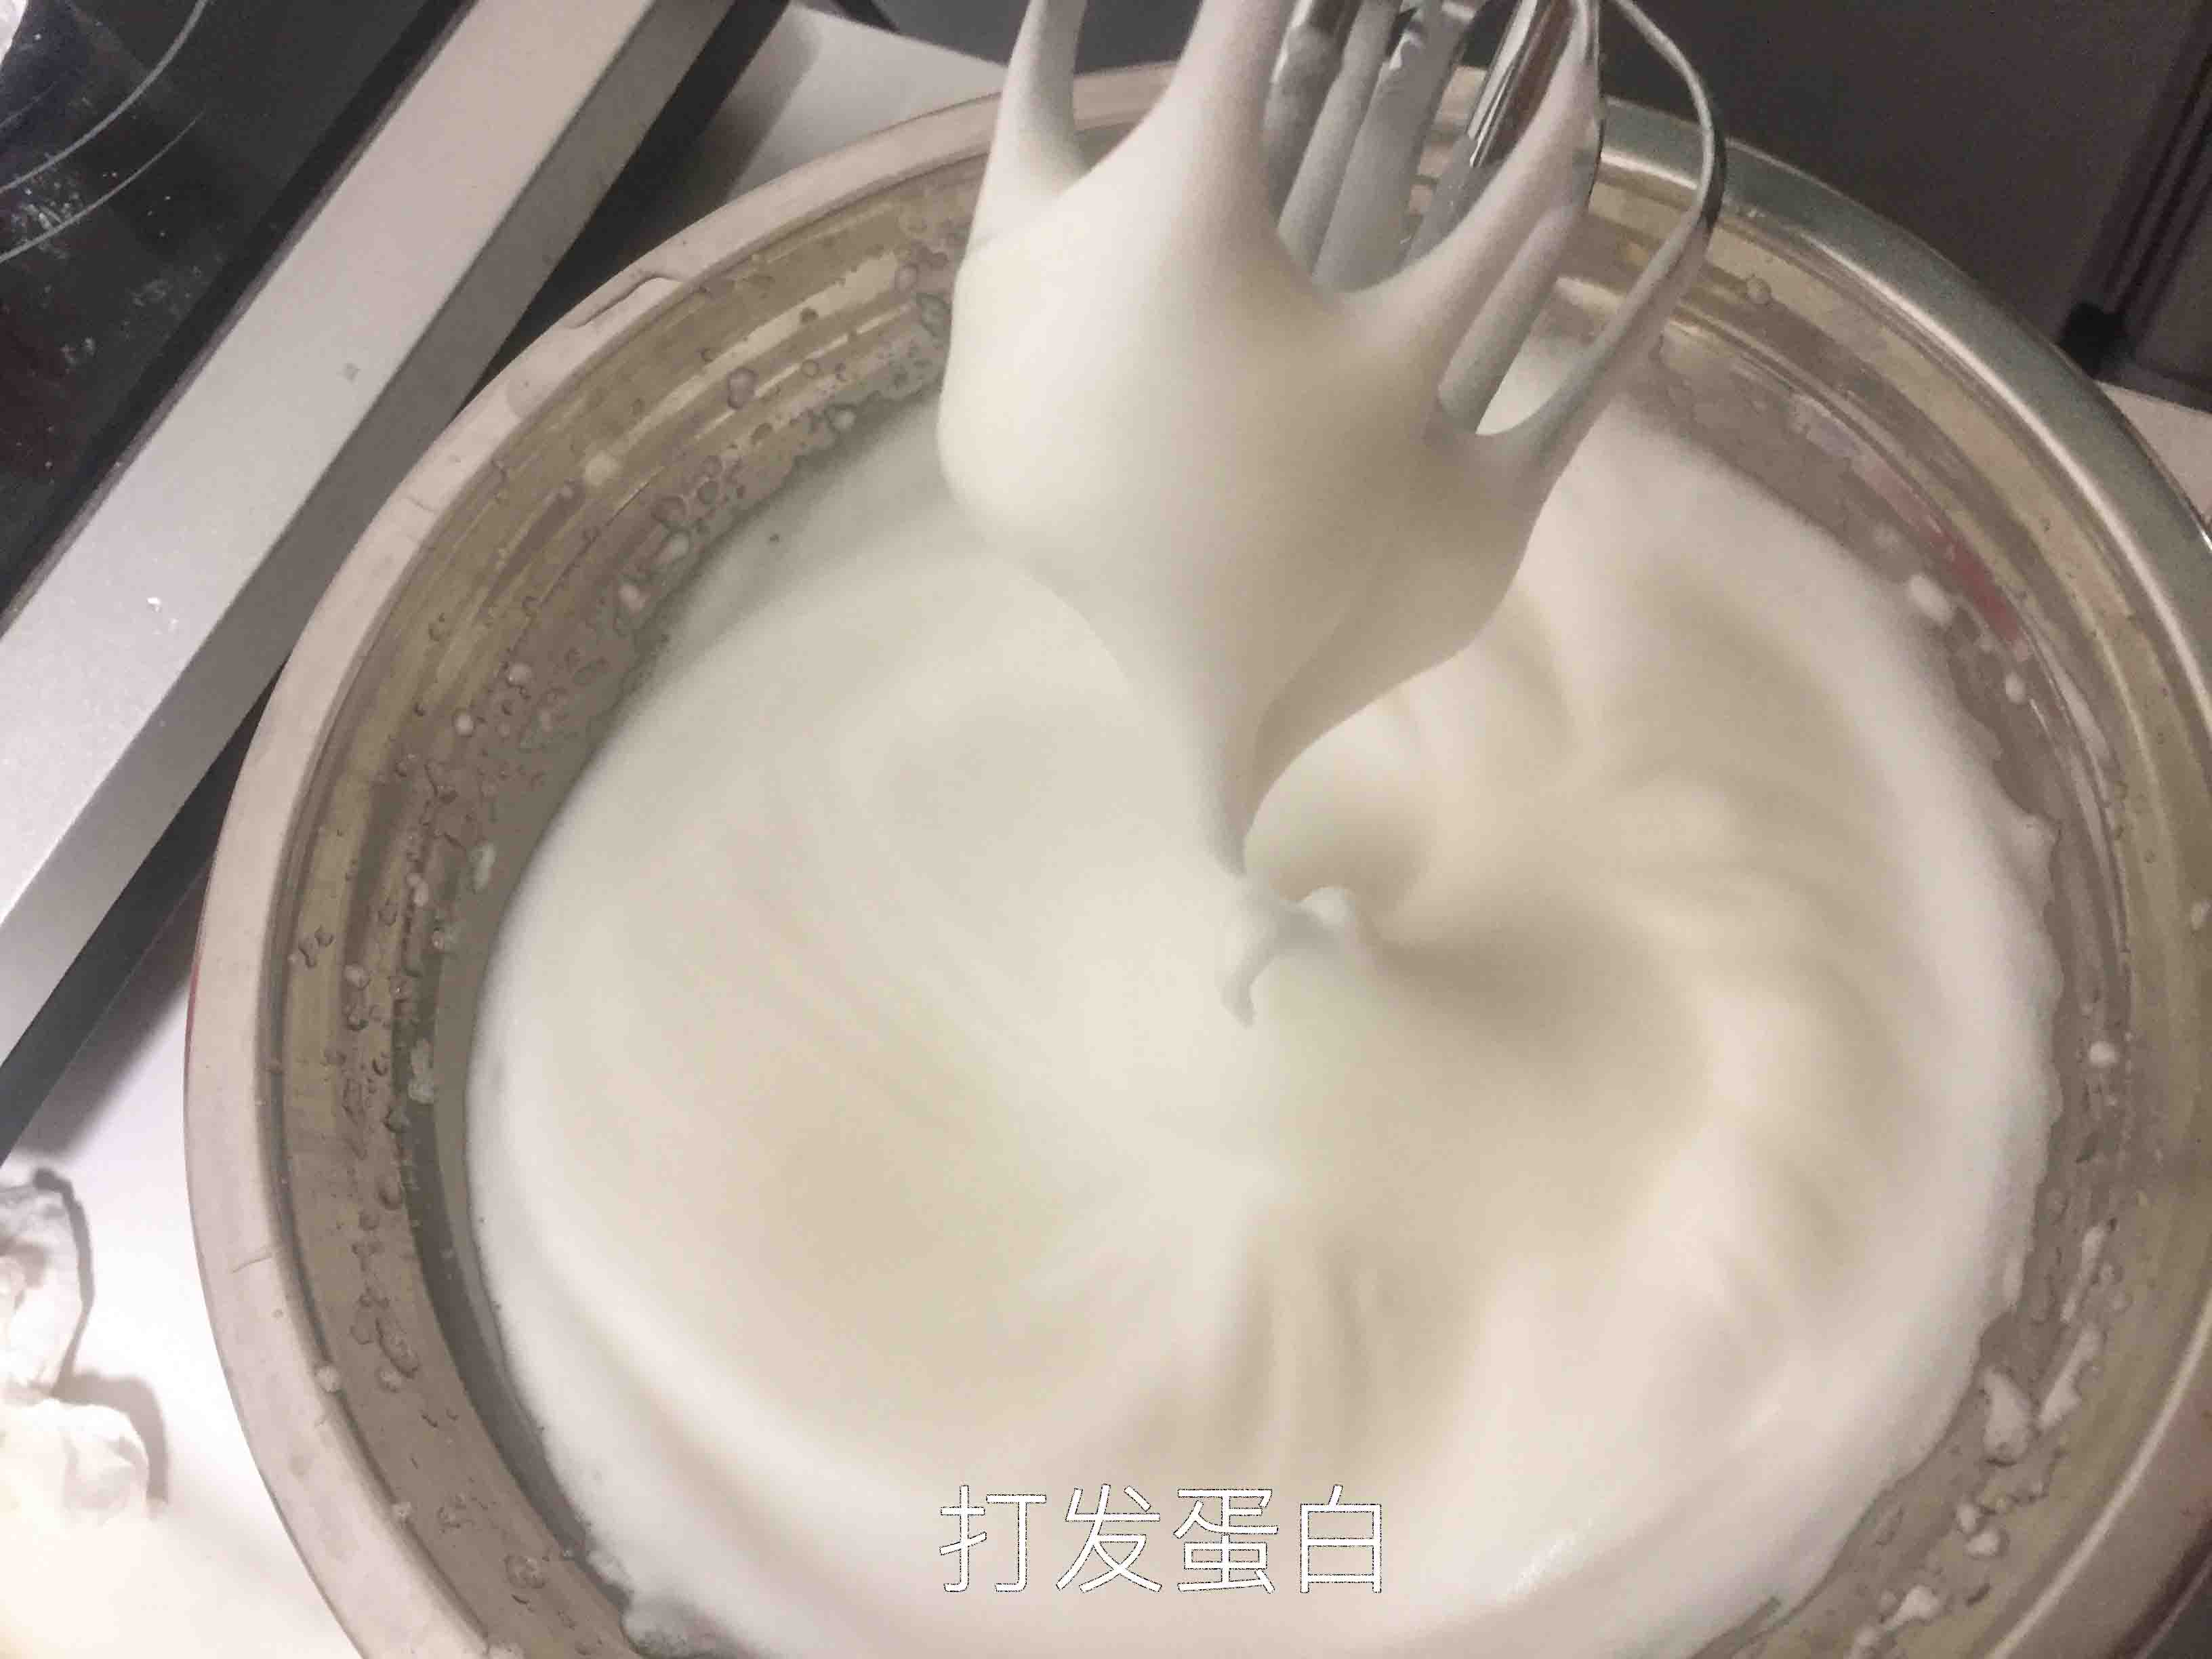
Whipping Egg Whites
- Prepare the remaining 3/4 of the granulated sugar. Divide it into three equal parts, each being 1/4 of the total amount
- Add lemon juice or white vinegar to the egg whites (optional)
- Using an electric mixer at medium speed, whip the egg whites until they form large, coarse bubbles, then add the first portion of sugar
- Increase the mixer to high speed and whip the egg whites until the bubbles become finer, then add the second portion of sugar
- Keep the mixer on high speed and whip the egg whites until they reach a "soft peak" stage (when you lift the mixer head, a long, curved tip forms), then add the third portion of sugar
- Reduce the mixer speed to medium-low and whip the egg whites until they reach a "stiff peak" stage (when you lift the mixer head, a short, upright tip forms; when you invert the bowl, the egg whites should not fall out)
- The egg whites are now whipped to the required consistency
- For reference on judging the state of the egg whites, see the images in the attached link.
- The mixer head should be kept close to the bottom of the bowl to prevent the top layer from being over-whipped while the bottom remains liquid.
Folding the Batter
- Give the egg yolk mixture a simple stir a few times
- Use a spatula to take 1/3 of the meringue and add it to the egg yolk batter
- Use the "folding" technique to avoid deflating the batter
- The folding technique involves:
- First, insert the spatula held in your right hand from the center of the bowl down to the bottom
- Scrape towards the 8 o'clock position until you hit the side of the bowl, then lift the batter up into the air and bring it back to the center of the bowl to drop it in
- Hold the bowl with your left hand and rotate it from the 9 o'clock position to the 7 o'clock position, completing a 60-degree rotation for one cycle
- The speed should be approximately two cycles per second
- This method comes from "Miss Kojima's Cake Classroom." In layman's terms, it is like stir-frying vegetables.
- Pour the mixture of the 1/3 meringue and egg yolk batter into the remaining 2/3 of the meringue, and continue folding until evenly combined
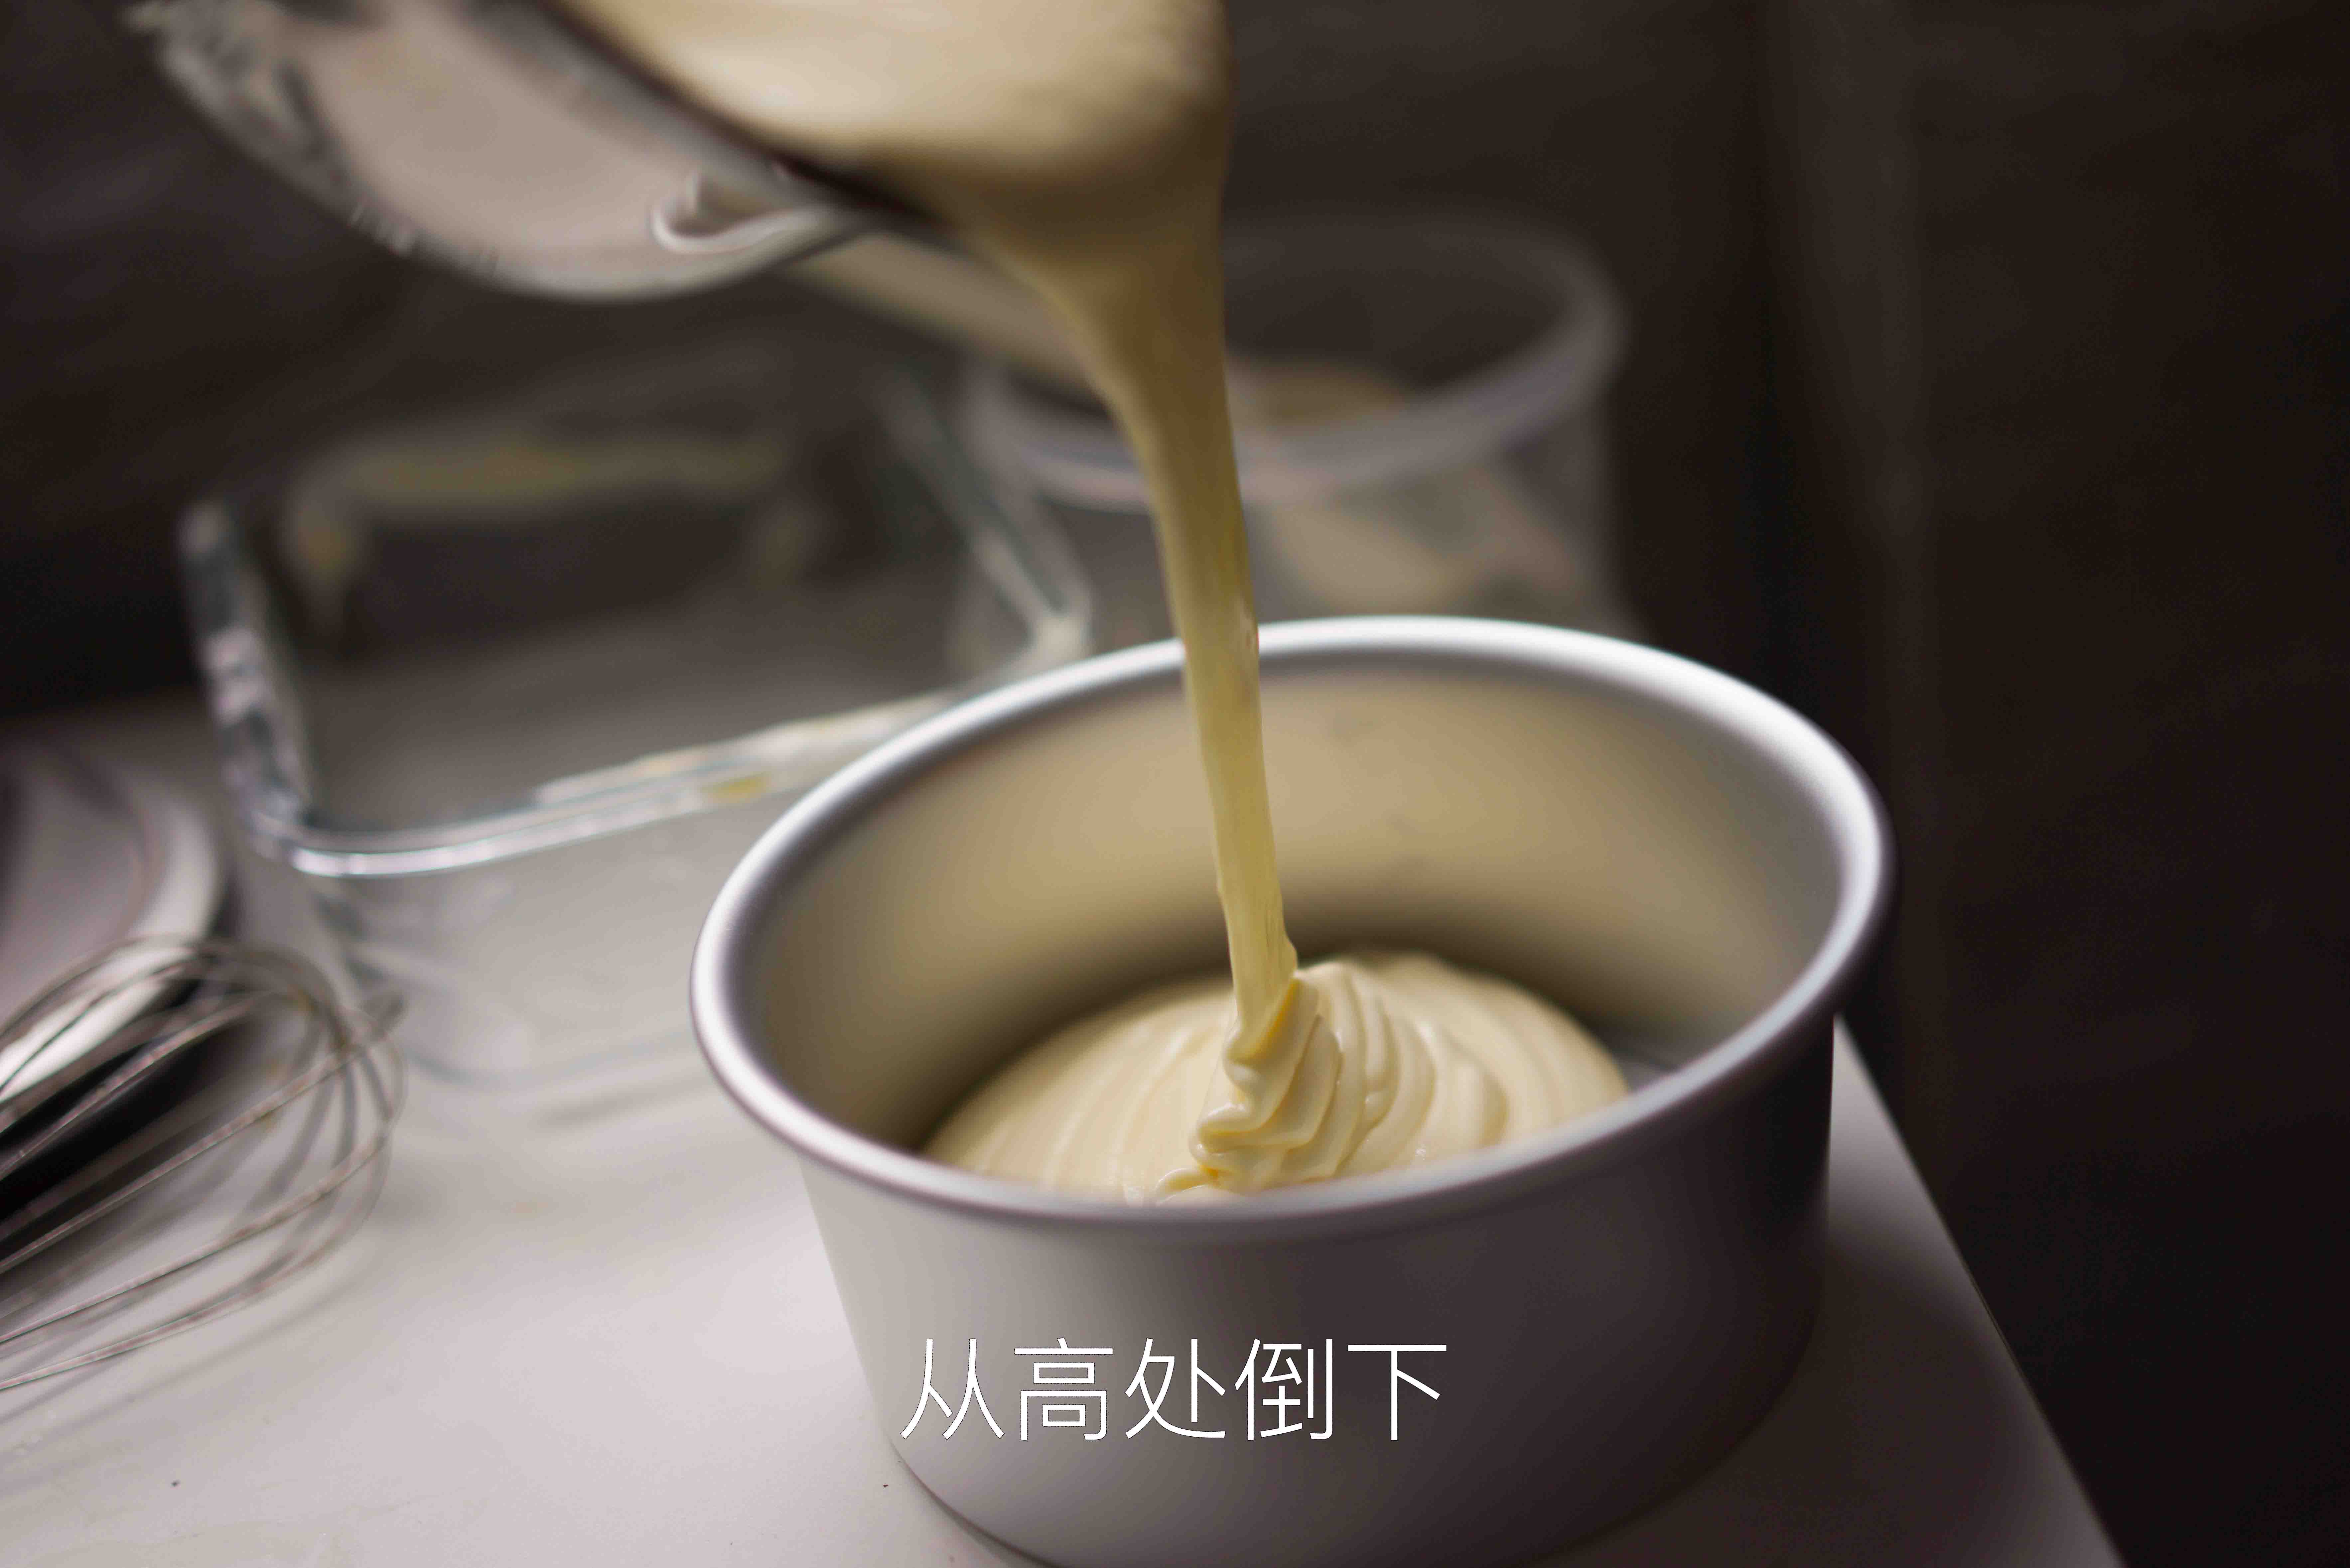
- Pour the cake batter into the mold and tap it a few times to remove large air bubbles
Baking
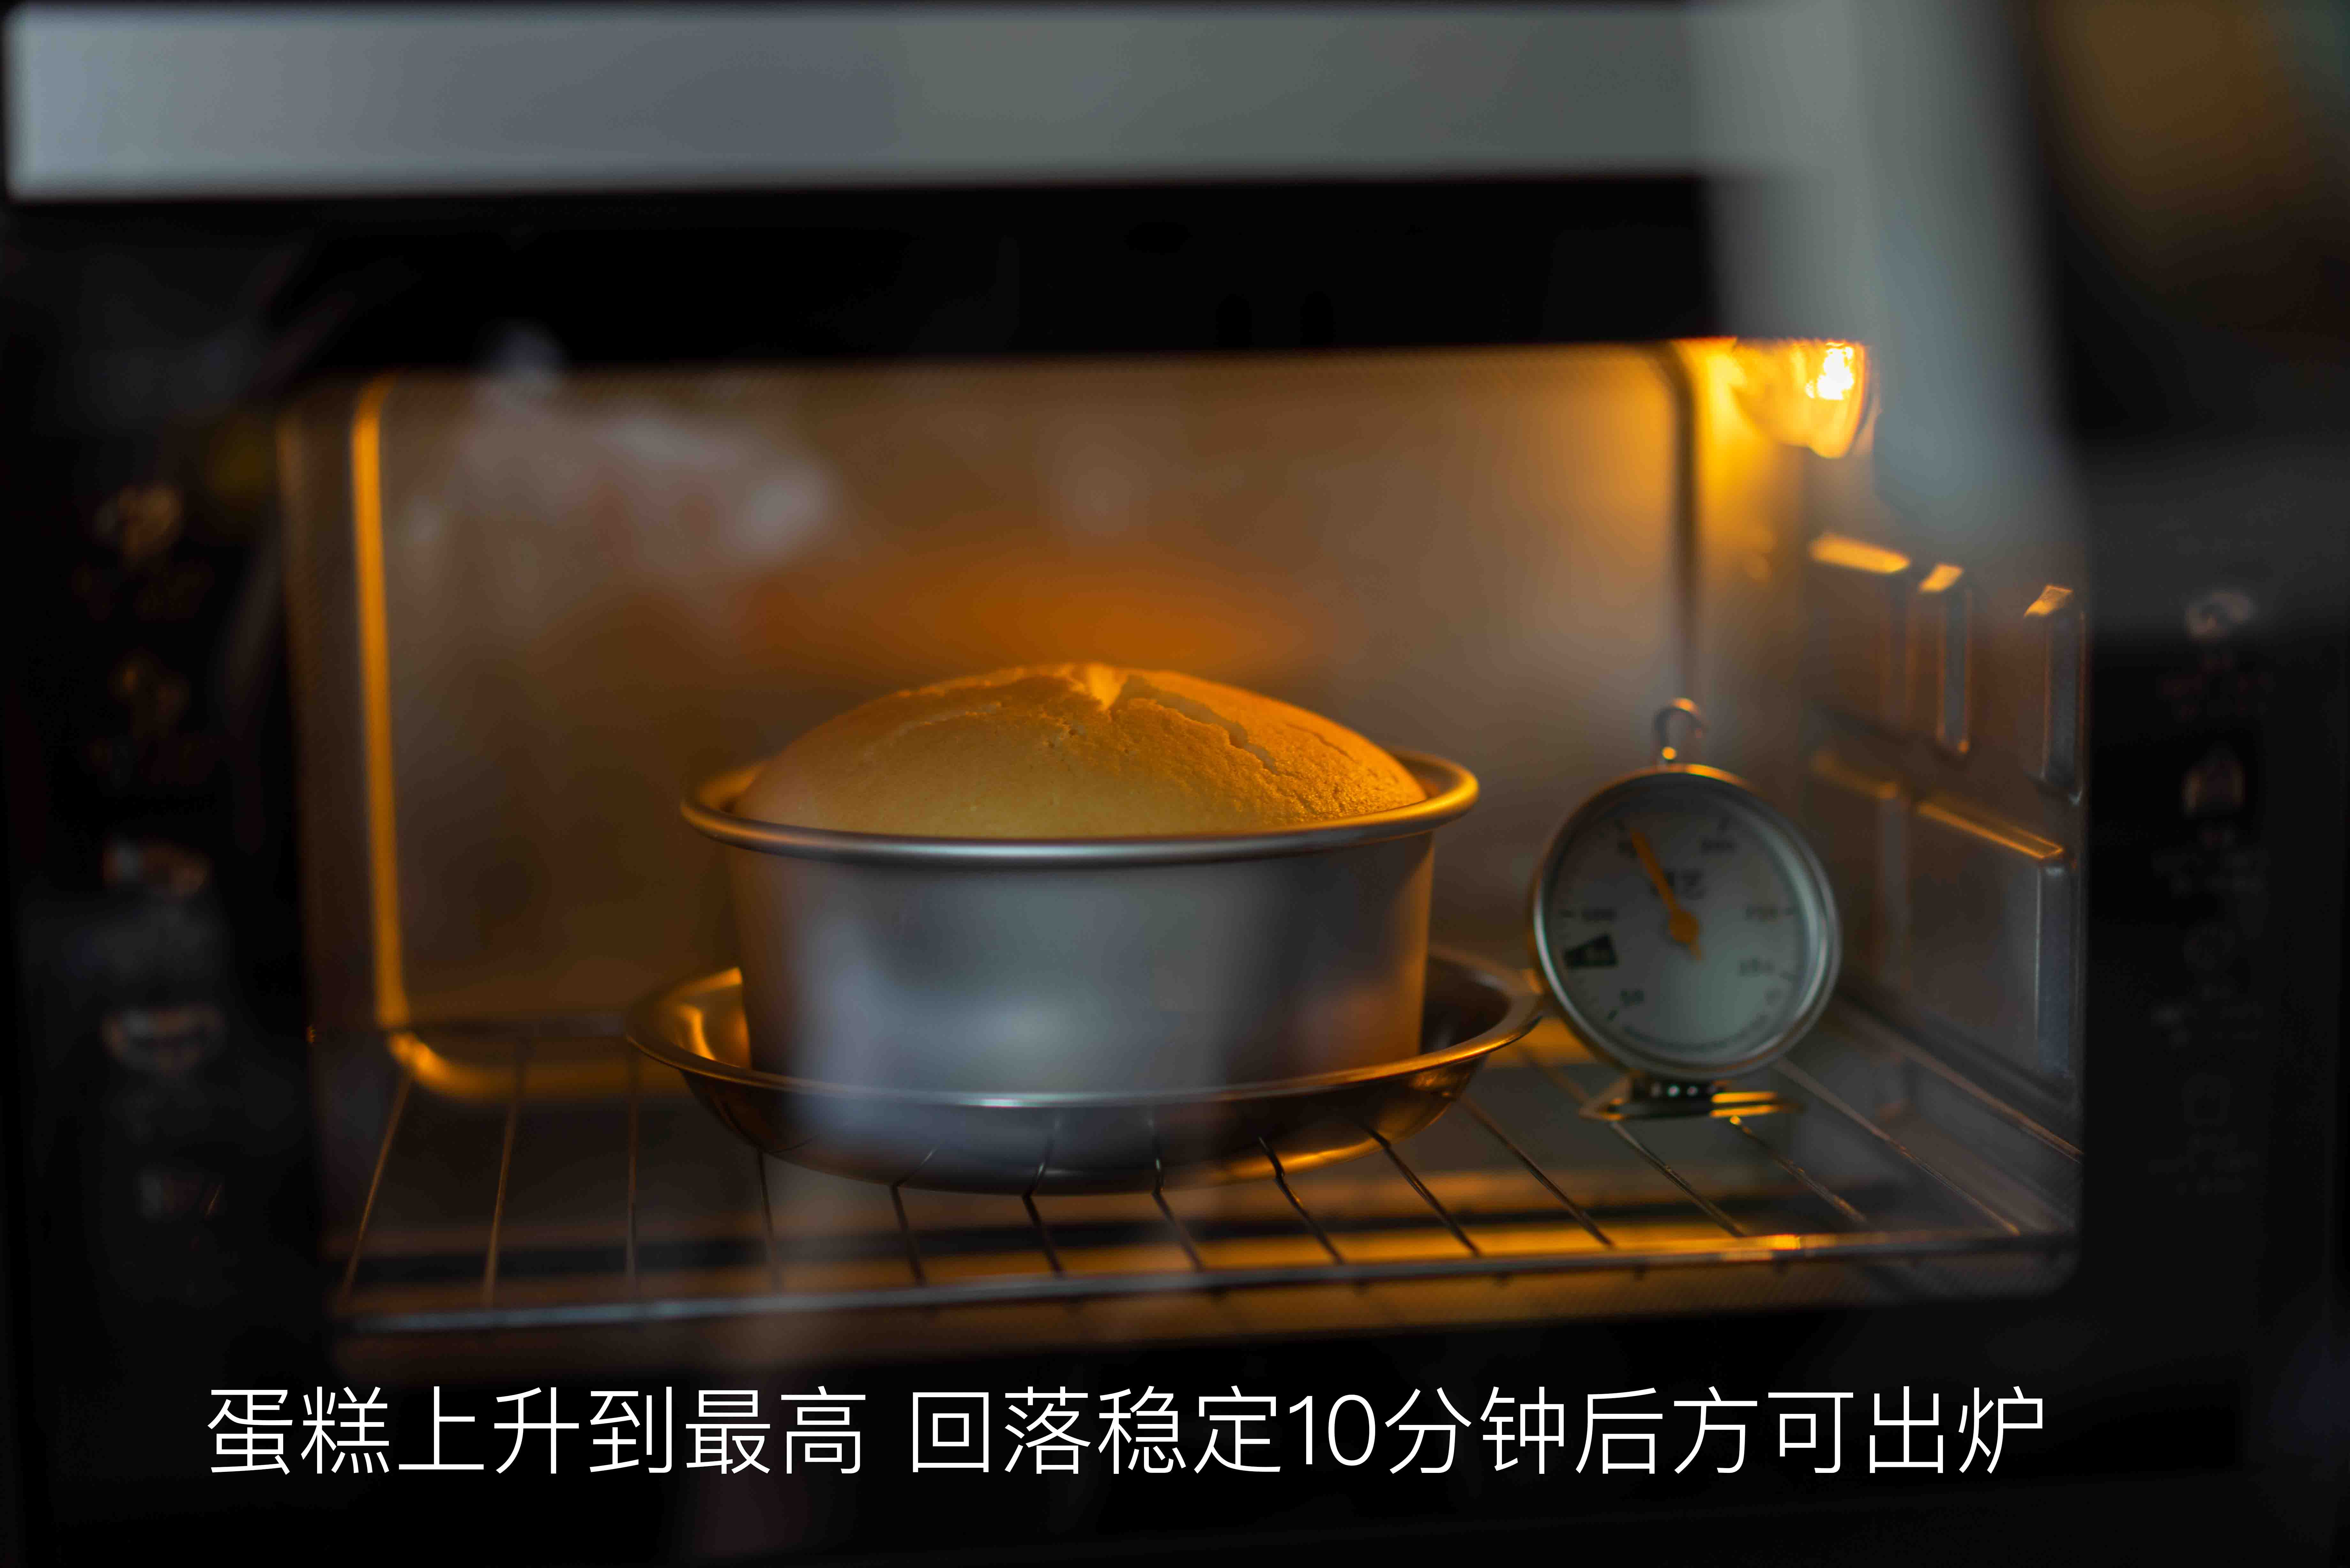
- Total baking time: 30-35 minutes for a 6-inch cake, 50 minutes for an 8-inch cake. Adjust flexibly based on your oven's characteristics; generally, do not exceed $\pm 5$ minutes. (Observe in front of the oven during the last few minutes.)
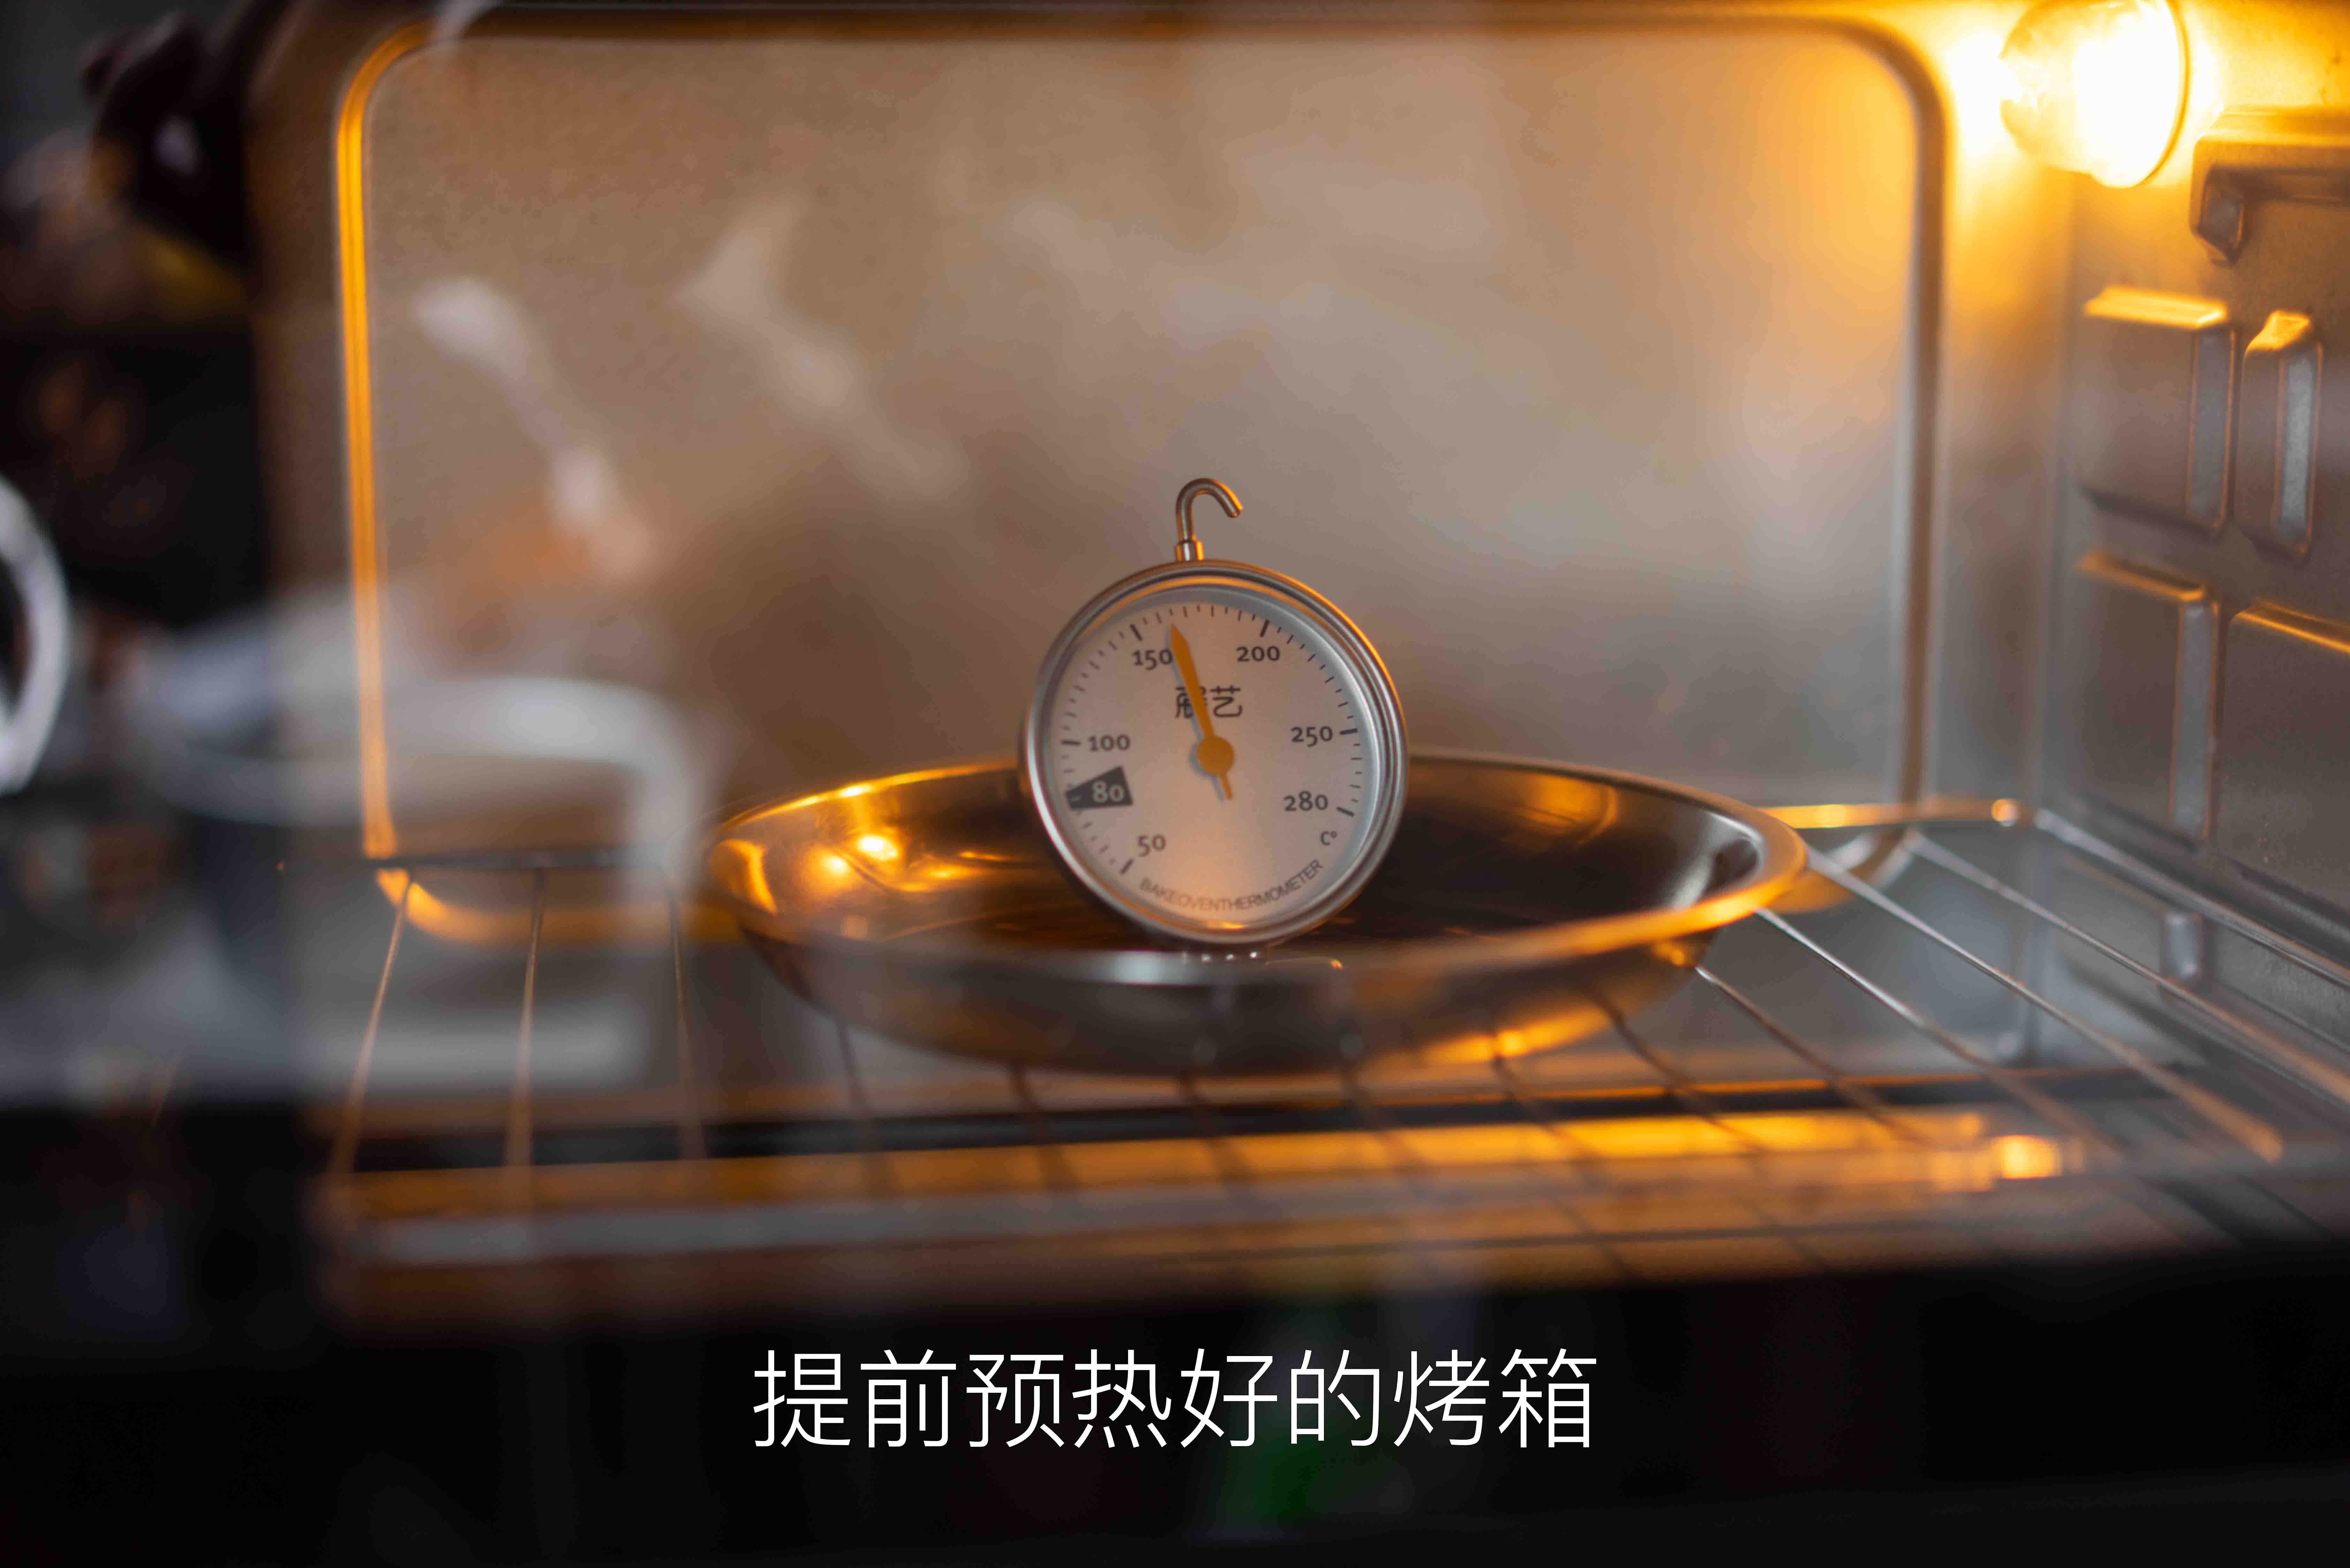
- Preheat the oven with the top element at 150 °C and the bottom element at 160 °C. It takes about 10 minutes to reach the target temperature.
- After preheating, place the mold on the lower rack of the oven.
- Select variable temperature baking, which consists of two stages:
- Stage 1 oven settings: Top element 150 °C, bottom element 160 °C;
- The first 3/5 of the total baking time is Stage 1;
- Stage 2 temperature: Top element 160 °C, bottom element 170 °C;
- The last 2/5 of the total baking time is Stage 2. Switch stages by directly adjusting the oven temperature.
- Once baked, remove from the oven:
- This step may scald your hands; use a towel for assistance.
Cooling and Unmolding
- (Optional) Drop the mold from a height to release hot air.
- Invert the mold for 10 minutes to cool the cake:
- Removing the cake from the mold before it cools may damage it.
- This step may scald your hands; use a towel for assistance.
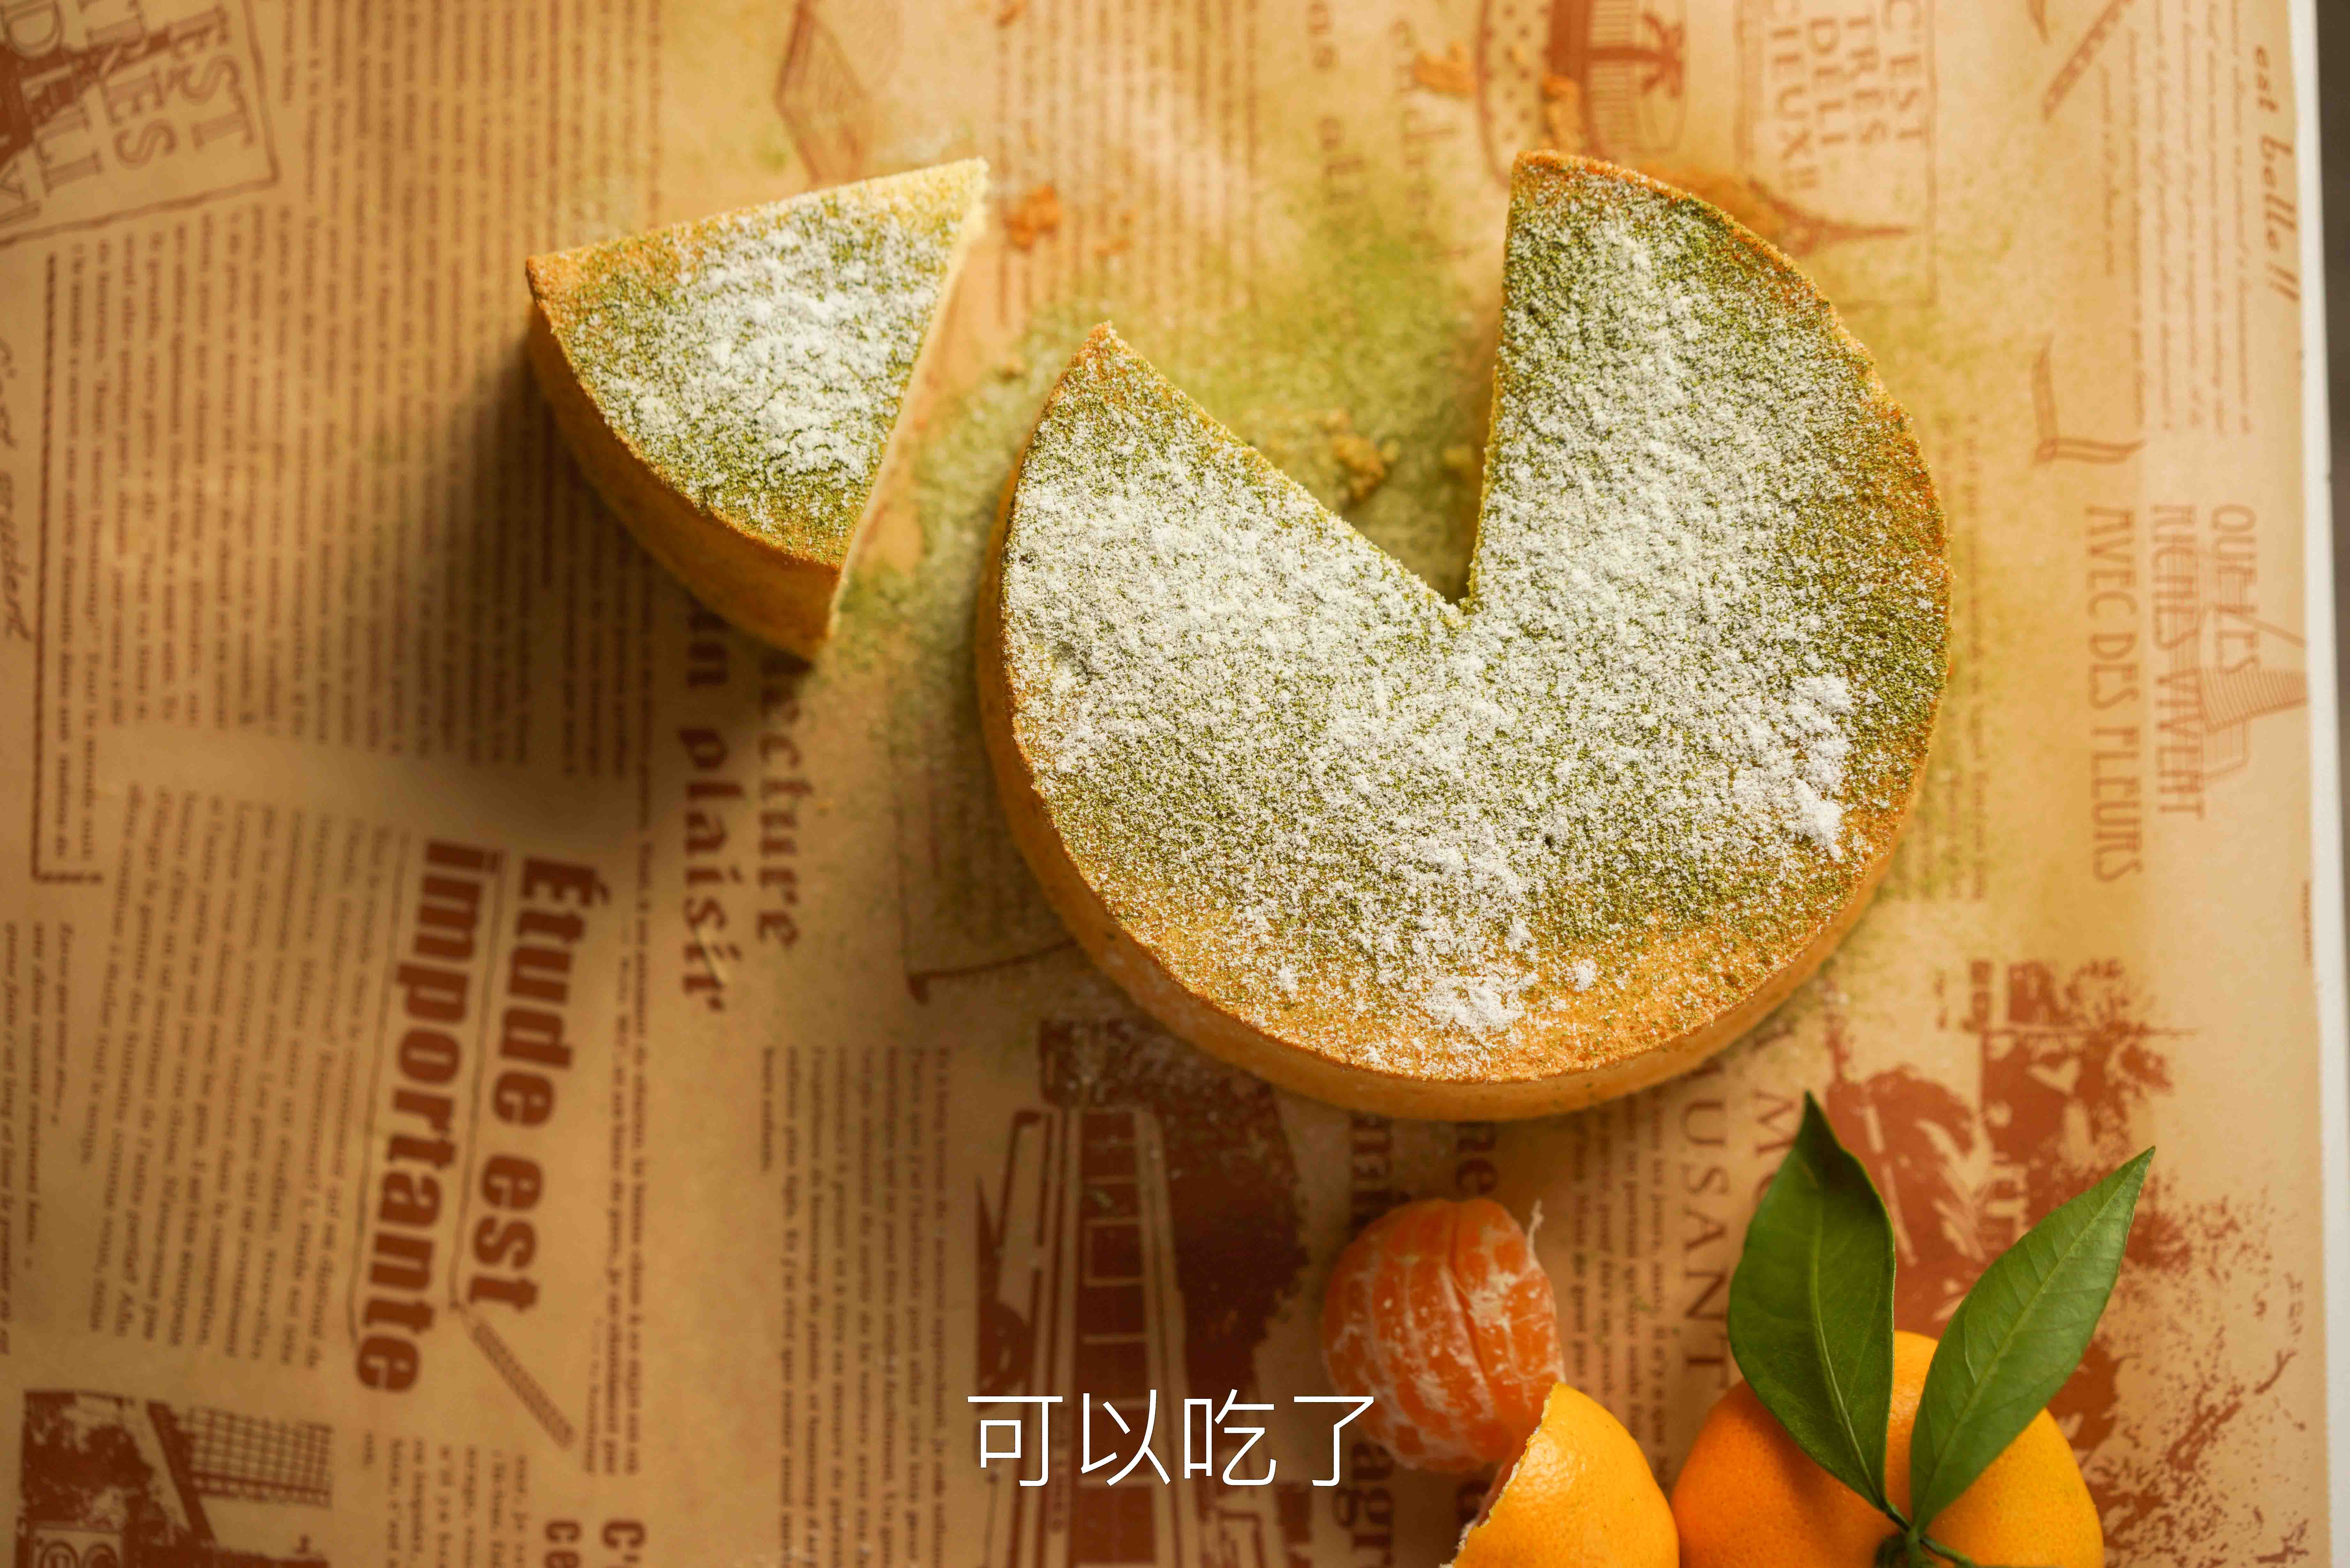
- Unmold and serve.
Additional Notes
- Referenced the following tutorial, which provides very detailed instructions with images for each step. It also explains the rationale behind each operation, the underlying principles, and analysis of potential issues:
- To make this Chiffon Cake, I used a whole box of eggs, and never again will I face a sunken bottom or collapse
- For Chiffon cakes, whipping egg whites is a secondary concern; the key is the temperature and time during baking.
- Regarding the containers for egg whites and yolks: The egg white container may have water droplets, but the egg yolk container must not.
- Reason: Oil affects the whipping of egg whites. Since egg whites are 85% water, slight water droplets do not hinder whipping.
- For very fresh eggs, the egg whites are firmer. For a 5-egg recipe, adding 15ml of water helps whip the egg whites (3g of water per egg).
- The sugar added during whipping actually dissolves in the water within the egg whites first, forming a syrup solution that coats the bubbles and protects them.
- Temperature significantly affects the rate and solubility of sugar dissolving in water. Egg whites taken directly from the refrigerator are harder to whip. However, colder eggs are easier to separate. It is recommended to let them return to room temperature before whipping.
- Some reference images:
If you encounter any issues or have suggestions for improvement while following this guide, please submit an Issue or Pull Request.