How to Make Basic Milk Bread
Bread is a common staple food. Ordinary bread requires long fermentation and kneading times. However, this recipe simplifies the steps as much as possible to make it beginner-friendly while preserving its flavor. Of course, if you have higher requirements, you can refer to other bread recipes.
This recipe requires many additional tools, which will be introduced in detail in the following sections.
This recipe is aimed at baking beginners, with a medium difficulty level and an estimated preparation time of 200 minutes.
Estimated Cooking Difficulty: ★★★★★
Essential Ingredients and Tools
Required Ingredients
- High-gluten or all-purpose flour (Preferably use high-gluten flour, but avoid using low-gluten flour. All "all-purpose flour" mentioned without special instructions refers to all-purpose flour.)
- Eggs (Size and weight are not critical.)
- Sugar (If you have syrup, that would be best.)
- Dry yeast
- Salt
- Milk, light cream, condensed milk, or milk powder (It is best to use milk powder for a rich milky flavor, but do not use any compound milk powders, such as adult or infant formula, due to unstable chemical properties. You can also mix two dairy products. Try to avoid ingredients with added sugar, as the actual sugar content may exceed the amount recommended in this recipe.)
- Butter or corn oil (If the selected dairy product has a very high fat content, you may skip adding extra fat. Preferably use unsalted animal butter. Soybean oil may have a bean-like aroma, so it is best to avoid using it.)
- Vital wheat gluten (optional)
- Vanilla extract (optional)
Necessary Tools
- Oven (Do not use an oven without temperature control)
- Measuring cups
- Cloth
- Rolling pin
- Parchment paper or molds
Optional Ingredients, Tools, and Introductions to Ingredients and Tools
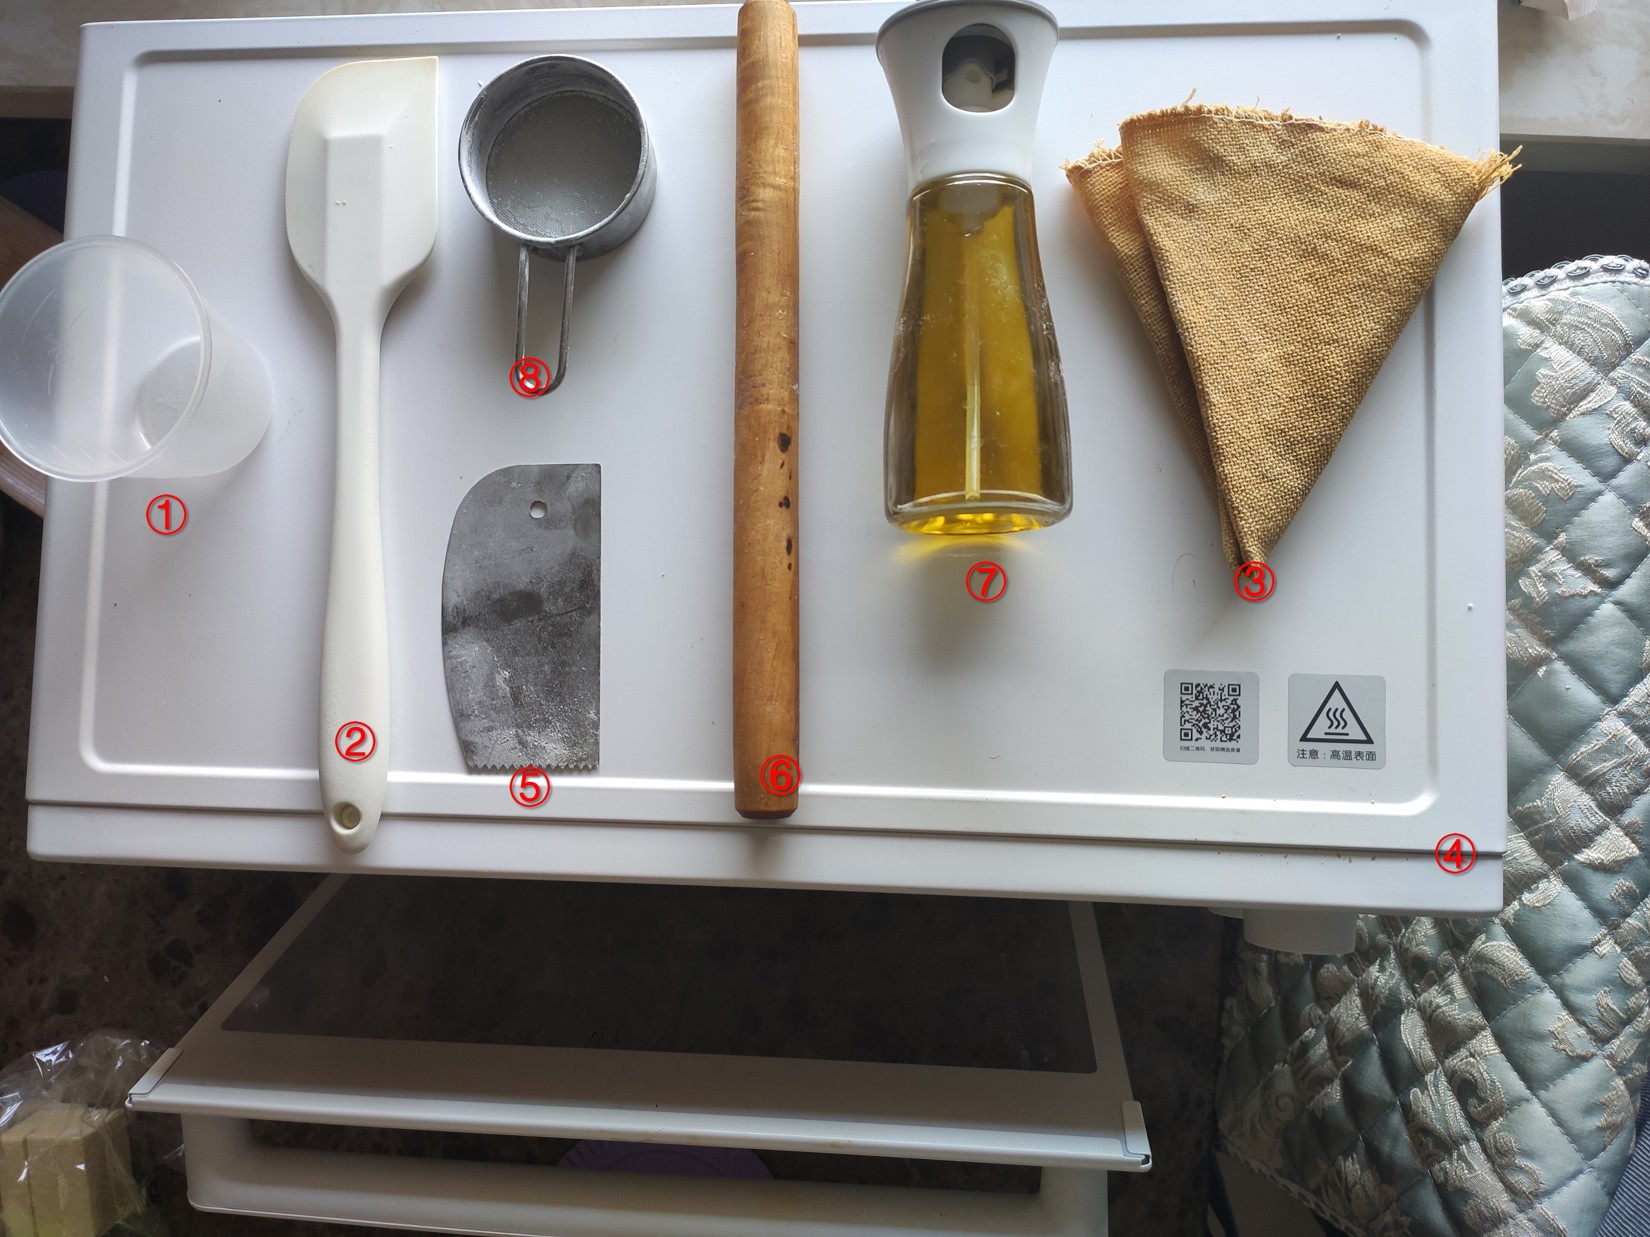
Baking is a distinct category of culinary arts, so its tools differ significantly from those used in everyday cooking. Below are descriptions of commonly used tools.
- ① Measuring cup: Used to measure ingredients. Measuring cups are generally measured in units of "cups." Do not shake the cup while measuring to avoid under-measuring the ingredients.
- ② Spatula: Also known as a silicone scraper, it is used for stirring and scraping batter or dough stuck to the edges of containers.
- ③ Cloth: Placed over the dough surface to prevent excessive moisture loss during the preparation process. Choose between a damp or dry cloth based on the specific requirements of the recipe. It is recommended to use a steamer liner cloth (not disposable) or plastic wrap.
- ④ Oven: Used for baking ingredients. Ovens are categorized into small, economical models and large, professional ones. Economical ovens often have poorer insulation, which can lead to uneven heating; in such cases, lower the temperature and extend the baking time. Ovens must be preheated before use. This will be discussed in detail in subsequent chapters.
- ⑤ Bench scraper: Used to scrape dough off the work surface and cut dough into appropriate sizes. A clean knife can also be used as an alternative.
- ⑥ Rolling pin: Used to flatten and press the dough.
- ⑦ Spray bottle: Used to evenly coat the dough or container surface with water or oil, helping to create a crispy crust and prevent sticking.
- ⑧ Sifter: Used to evenly distribute flour or remove lumps and impurities.
- ⑨ Work surface or silicone mat: Used as a surface for kneading, preventing the dough and the surrounding area from getting dirty.
- ⑩ Brush: Used to brush egg wash onto the dough, giving the finished product a shiny, glossy, and attractive appearance.
-
- Parchment paper: Prevents the baked goods from sticking to other items and makes it difficult to release them from the mold. Parchment paper is heat-resistant and safe to use. Some parchment papers have a specific side orientation, so be careful when using them.
-
- Mold: Helps shape the bread during baking. While there are few specific requirements for bread molds, cake molds should ideally be made of anodized aluminum and coated with a non-stick spray mixture to help the cake rise properly.
- Vital wheat gluten: This is a protein extracted from wheat that forms a mesh-like structure when it absorbs water. It is widely used in daily life, such as in making seitan.
- Vanilla extract: A highly purified natural flavoring derived from vanilla beans. It is commonly used to make vanilla-flavored foods and also helps neutralize off-flavors, such as the eggy smell.
Calculations
Note: Although specific ingredient quantities are provided, factors such as indoor temperature, humidity, and even the amount of yeast in the air can affect the preparation process. This recipe will provide adjustment suggestions as needed during the process.
The "cup" is a common baking measurement unit because it allows for easy conversion between volume and weight. 1 cup = 250 ml. Generally, 1 cup of flour = 120 g. For more conversions, see the appendix.
Here, larger quantities are measured in cups, and smaller quantities are measured in grams.
Per serving:
- Sourdough Starter
- Flour: 1 cup (fill the cup and level off the excess with a spoon; do not shake)
- Warm water (30°C / 86°F, comfortable to touch): 1 cup
- Yeast: 2 g
- Salt: 2 g
- Dough
- Flour: 2½ cups
- Egg: 1
- Sugar or syrup: ⅛ cup
- Dairy products: ¼ cup total (reconstitute milk powder with water)
- Butter or corn oil: ⅛ cup
- Vital wheat gluten: ¼ ~ ½ cup (optional)
- Vanilla extract: 3 g (optional)
Instructions
Making the Sourdough Starter
The sourdough starter is a pre-fermented product. Pre-fermentation not only increases the success rate but also allows for a longer fermentation time, which enhances the bread's flavor. If possible, ferment the starter for 4 days to achieve the best flavor. However, for beginners, a starter fermented for just 30 minutes will already yield impressive results. Let's proceed with making the starter.
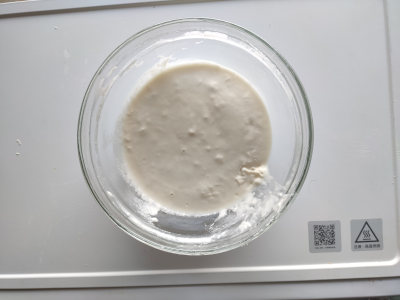
- First, mix the yeast with warm water at 30°C (86°F) using a spatula or kitchen utensil until well combined. Let it sit for 5 minutes. Then, mix it with the flour and stir until uniform. The starter at this stage should be a very thick batter.
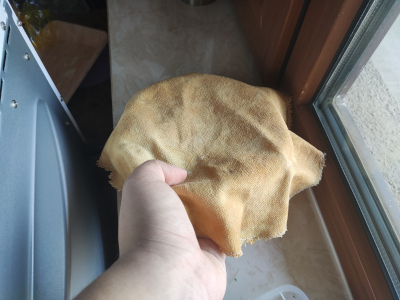
- Cover the batter with a cloth and place it in a warm place to ferment for 45 to 60 minutes.
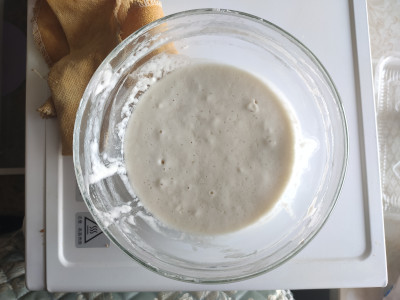
- The final batter should have many bubbles on the surface and have visibly increased in volume.
Did the fermentation fail? Check here:
- Ensure the yeast has not expired.
- Ensure the water temperature is appropriate.
- Extend the fermentation time; you can leave it in the refrigerator overnight.
- The temperature might be too low. In this case, preheat the oven to 60°C (140°F), turn it off, and place the starter inside to ferment.
- You can add an equal amount of yeast, mix well, and restart fermentation, extending the time.
- Try adding 3 g of sugar and fermenting again.
How to make a "permanent" sourdough starter?
With a starter, baking bread anytime is no longer a dream! You can make a "permanent" starter using the following method:
- After making the starter as described above, store it in a cool place (even in the refrigerator!). Every 1–3 days, sprinkle a thin layer of flour on top (just enough to cover the visible batter thickness), stir again, and continue covering with a cloth to ferment. If the fermentation is too fast and the volume becomes too large, discard a portion.
- When you are ready to bake bread, keep only the amount of starter equal to its pre-fermentation volume to continue fermenting, and use the rest for the dough.
- Over time, the starter will develop a unique aroma, which is the best "ingredient" for bread!
Making the Dough
With the starter, you're halfway there!
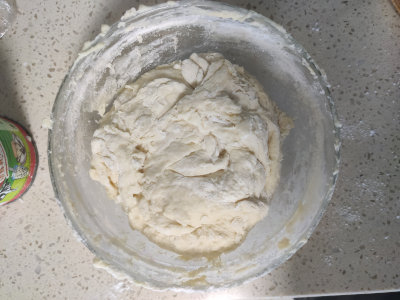
- Combine all remaining ingredients with the starter using a spatula. Be sure to scrape the sides of the bowl to ensure thorough mixing. Once the dough comes together and no dry flour remains, press it with one clean, dry hand while holding the bowl with the other to form a cohesive mass. Then, turn it out onto a work surface or silicone mat.
The dough should now be formed and relatively soft. If it fails to come together and is very sticky, there may be insufficient flour; add ¼ cup of flour and mix again until it forms. If the dough has formed but there is still a lot of dry flour, it needs more kneading. Increase the kneading time accordingly.
When pressing the dough, push it away with your fist, fold it over, and push it away again. Repeat this process to incorporate all flour from the sides of the bowl into the dough.
- Use the heel of your hand to push the dough away, fold it over, and push it away again until there are no dry flour lumps on the surface. The dough will not yet be smooth.
If using a work surface, some sticking may occur. Use a scraper or knife to lift the dough if needed.
If the dough has formed but is quite stiff, it may lack moisture. Lightly wet your hands or use a spray bottle to moisten the surface evenly, then cover with a damp cloth and let it rest for 20 minutes. Repeat if necessary.
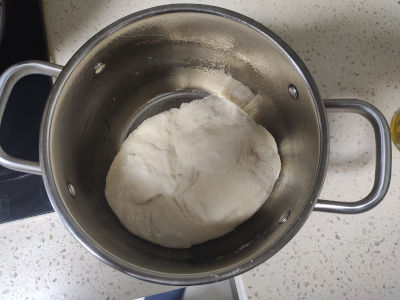
- Spray the inside of a container (at least three times the volume of the dough) with vegetable oil (or coat it evenly by hand). Place the dough inside, cover with a cloth, and let it ferment for 1 hour.
If fermentation issues arise, refer to the troubleshooting section under "Starter Preparation" for solutions to failed fermentation.
The surface of the fermented dough should be tacky. If it is not, lightly wet your hands or use a spray bottle to moisten the surface evenly, then let it ferment for another 20 minutes.
- The dough should now be twice its original size. Lightly dust a work surface or silicone mat with flour (just enough to see the surface underneath). Turn the dough out and press it gently with your hands to release the air.
- Use a rolling pin to roll the dough into a 1 cm thick sheet. Then, roll it up tightly from one end to the other, ensuring no air pockets remain.
- Rotate the dough 90° and repeat steps 4 and 5.
- Shape the bread and place it seam-side down on a baking sheet lined with parchment paper or in a greased mold.
You can spray the baking sheet lightly with oil or brush it with a thin layer of butter before placing the parchment paper. This will prevent the paper from shifting.
- Let it ferment in the tray or mold for 30 to 45 minutes.
If fermentation issues arise, refer to the troubleshooting section under "Starter Preparation" for solutions to failed fermentation.
- Meanwhile, preheat the oven.
Oven preheating: Preheat the oven to its highest temperature for at least 20 minutes without any food inside.
- Use scissors or a knife to score several slits on the bread for decoration.
- Brush the bread with egg wash. (Optional)
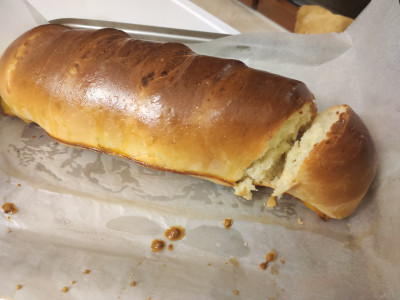
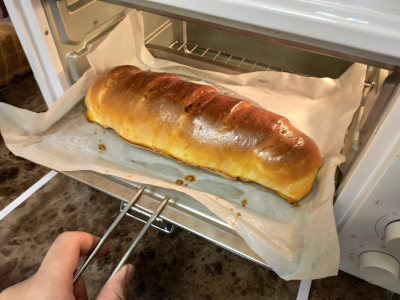
- Place in the oven and bake at 180°C (top and bottom heat) for 30 minutes, then reduce the temperature to 165°C and bake for an additional 10 minutes.
Oven temperatures can vary. During baking, observe the bread. If there is no noticeable color change after 30 minutes, the temperature is too low. In this case, increase the temperature by 5–10°C or bake for an additional 5–10 minutes. After baking, taste the bread. If the crust tastes bitter (note: as long as it isn't bitter, it is not overbaked), the temperature is too high. Try reducing the temperature by 5–10°C or decreasing the baking time by 5–10 minutes. If the exterior is caramelized but the interior is undercooked, reduce the temperature by 5–15°C and extend the baking time by 10–20 minutes.
If the bread crust becomes too hard or cracks significantly, cover the bread with aluminum foil and remove it during the last 10 minutes of baking, or place another baking tray upside down on the top rack and remove it during the last 10 minutes.
- Allow to cool completely, then store in a food-grade bag. It can be kept fresh for one week. Frozen storage lasts for one month.
After sealing the bread in a food bag overnight, both the interior and the crust will become softer. Therefore, the best time to enjoy it is the next morning.
Additional Information
- Common Ingredient Conversions (for reference only)
| Volume /cup | Ingredient | Weight /g |
|---|---|---|
| 1 | Butter | 227 |
| 1 | Flour | 120 |
| 1 | Granulated Sugar | 180 ~ 200 |
| 1 | Coarse Sugar | 200 ~ 220 |
| 1 | Powdered Sugar | 130 |
| 1 | Chopped Dried Fruits | 114 |
| 1 | Raisins | 170 |
| 1 | Honey | 340 |
- How to Store Excess Bread
You can slice the bread and freeze it. When ready to use, let it come to room temperature or heat it directly. Do not refrigerate! Refrigeration causes bread to lose moisture rapidly.
- Recommended Serving Suggestions
a. Take a large piece of bread and cut it in half horizontally. Place it in a pan over low heat and warm it for 1 to 2 minutes (generally no oil is needed, but if you prefer a crispy crust, you can brush butter on the bread surface before frying). b. Spray 3 to 4 pumps of oil into the pan using a spray bottle, heat over high heat until the pan is slightly smoking, then reduce to the lowest heat setting. c. Add one egg to the pan and cover with a lid. Wait for 2 to 3 minutes. Then flip the egg and cook for another 2 to 3 minutes. (This method produces a runny yolk egg. If you prefer a fully cooked egg, add up to 1 ml of water before flipping, reduce the heat to medium-low, and cook until the water evaporates. This will result in a fully cooked egg.) d. Spread your favorite sauce on both sides of the bread, and place the egg in between.
If you encounter any issues or have suggestions for improving the process while following this guide, please submit an Issue or Pull Request.